Light Alternatives to Heavy Steel Handlebars for Fixed Gear

Table of Contents
- Why Steel Handlebars Weigh Down Your Fixed Gear
- Material Face-Off: Alloy vs. Carbon vs. Chromoly
- Best Alloy Handlebars for Fixed Gear: Types and Picks
- Fixed Gear Handlebar Width Guide: Finding Your Fit
- Stem and Grip Compatibility for Vintage and Modern Frames
- How to Install Bike Handlebars on a Fixed Gear
- Conclusion
- Frequently Asked Questions
Last Updated: September 18, 2026
Why Steel Handlebars Weigh Down Your Fixed Gear
A fixed gear bike rewards every gram you remove, and fixed gear handlebars are one of the easiest places to shed weight. Heavy steel handlebars add mass at the steering axis, where every input from your hands travels through the bar. For riders chasing alternatives to heavy steel handlebars for fixed gear bikes, the bar is the first upgrade that makes sense.
Steel is strong and cheap, but dense: a typical steel bar weighs far more than an alloy or carbon replacement of the same shape.
Material Face-Off: Alloy vs. Carbon vs. Chromoly
The three materials you will weigh against each other are aluminum alloy, carbon fiber, and chromoly steel. Each trades weight, stiffness, and cost differently, and the right pick depends on how you ride, but the deciding factor is rarely the raw weight number on a spec sheet. It is how each material converts your input into steering and how it handles road buzz.
| Material | Weight | Stiffness | Vibration Damping | Best For |
|---|---|---|---|---|
| Aluminum alloy | Light | High | Moderate | All-round fixed gear |
| Carbon fiber | Lightest | Tuneable | High | Long rides, comfort |
| Chromoly steel | Heaviest | Moderate | High | Durability, low cost |
Weight-to-Stiffness: Where Each Material Wins
Weight-to-stiffness is the ratio that actually decides how a bar feels under power. It depends on tube diameter, wall thickness, and butting profile, but the pattern is consistent.
Vibration Damping and Ride Feel
Vibration damping is where steel and carbon pull ahead of alloy, though the mechanism differs. Steel flexes microscopically along its length, while carbon's resin matrix and fiber orientation dissipate energy across the layup. That is why a carbon bar can be tuned, stiffer in one direction, more compliant in another, while a steel bar's feel is largely fixed by its tube dimensions.
Matching the Material to Your Fixed Gear Riding
The material choice should follow your dominant riding style.
- Sprinting and stoplight-to-stoplight efforts: alloy, 31.8 mm clamp, butted tubing. Stiffness per gram matters more than comfort here.
- Long commutes and rough pavement: carbon if the budget allows, otherwise alloy plus wider tires and extra tape.
- Touring, cargo, or a bike that gets locked up outside: chromoly remains the most repairable and the most forgiving of abuse, and the weight penalty is least noticeable when you are not accelerating hard.
A common pattern is that riders buy carbon first, then realize they wanted stiffness, not comfort. Decide which you actually want before spending the money.
Best Alloy Handlebars for Fixed Gear: Types and Picks
The best fixed gear handlebars in alloy balance low weight with the shape that matches your riding. Three profiles dominate: bullhorn, riser, and drop bars.
- Bullhorn bars: forward-hooked ends for an aero tuck and strong sprinting grip.
- Riser bars: swept back and up for an upright, comfortable commuting posture.
- Drop bars: multiple hand positions for everything from cruising to hard efforts.
Bullhorn, Riser, and Drop Bar Options
Bullhorn bars suit riders who sprint and want a single aggressive position. Riser bars fit commuters who value an upright, relaxed posture and easy steering. Drop bars give the widest range of hand positions, which helps on longer rides when your hands need to move.
Fixed Gear Handlebar Width Guide: Finding Your Fit
Handlebar width should roughly match your shoulder width for control and comfort. A fixed gear handlebar width guide starts with one measurement: the distance across your shoulders, from the bony point of one shoulder to the other.
Stem and Grip Compatibility for Vintage and Modern Frames
Clamp diameter decides whether a bar fits your bike, and it is the most common reason a new bar sits unused in a garage. Modern stems almost always use a 31.8 mm clamp, while older and vintage frames often use 25.4 mm or 26.0 mm. Measure your stem's clamp before you buy, a bar that does not match will not mount.
Quill vs. Threadless: Why Vintage Frames Are Different
A modern threadless stem clamps the bar with a removable faceplate, so you can swap bars without touching the headset or brake cables. A vintage quill stem slides down inside the steerer tube, held by an expander wedge. Many quill stems have no removable faceplate at all, the bar has to be threaded through the stem from one side.
That single design difference changes everything about the upgrade:
- Threadless (modern): remove the faceplate bolts, lift the old bar out, drop the new bar in. A 31.8 mm bar is the safe default.
- Quill with a removable faceplate: same procedure as threadless, but confirm the clamp is 25.4 mm or 26.0 mm, not 31.8 mm.
- Quill without a removable faceplate: the bar must slide through the stem. This rules out most drop bars and any bar with a sharp bend or a welded crossbar, and it means you must remove the grips, levers, and tape to get the bar out.
Measuring Your Clamp Before You Buy
You do not need calipers to get close, but they remove all doubt. Measure the outside diameter of the bar where it passes through the stem, or the inside diameter of the stem clamp itself.
- 25.4 mm (1 inch): common on older road, cruiser, and BMX-style bars.
- 26.0 mm: found on some older road bars and Italian-pattern quill stems.
- 31.8 mm (1-1/4 inch): the modern standard for road, gravel, and most fixed gear builds.
Grip and Bar-End Diameter
Grip diameter matters too. Standard grips and bar tape fit common diameters, but lock-on grips need the right bar end. Most lock-on grips are designed for a 22.2 mm bar end, the near-universal standard for the grip area regardless of the clamp diameter in the middle. That is why a 31.8 mm bar and a 25.4 mm bar can both accept the same grips, the grip area is a separate, standardized dimension.
A Quick Compatibility Checklist
Before you buy any replacement bar, confirm all four of these:
- Stem type: threadless, quill with faceplate, or quill without faceplate.
- Clamp diameter: 25.4 mm, 26.0 mm, or 31.8 mm.
- Grip-area diameter: usually 22.2 mm, but verify on carbon and specialty bars.
- Lever and shifter clamp: if you run brakes, the lever clamp must fit the bar's grip area.
How to Install Bike Handlebars on a Fixed Gear
Installing a handlebar takes about 15 to 20 minutes with a set of Allen wrenches. The job is straightforward, but the order of steps keeps you from stripping bolts or misaligning the bar.
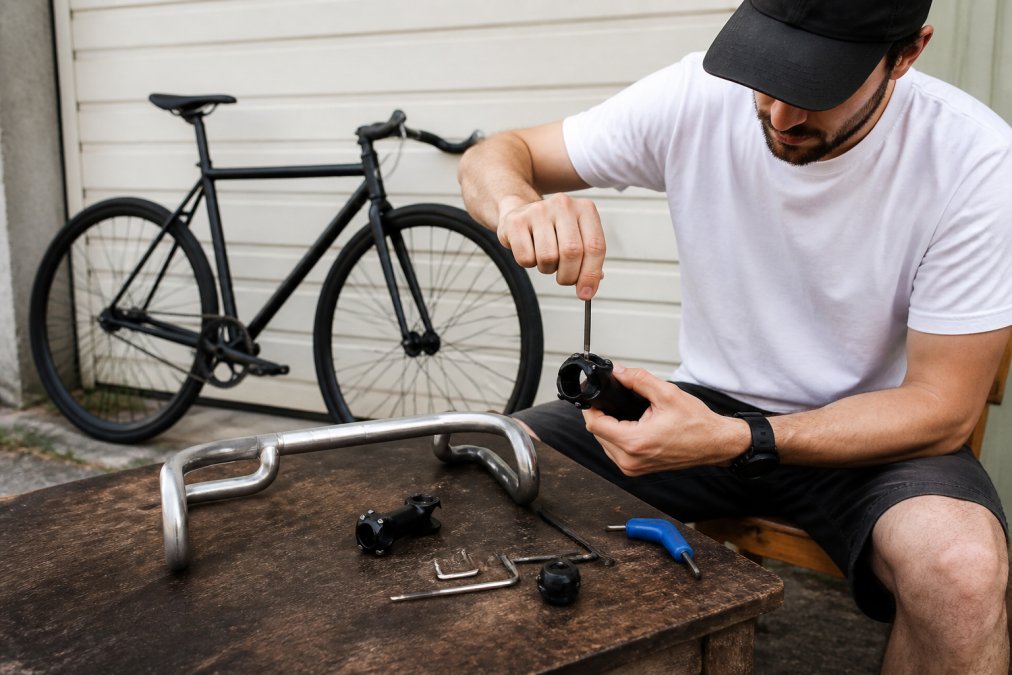
What you'll need:
- Allen wrench set
- Torque wrench (recommended)
- Grease or assembly paste
- The new handlebar and grips
Steps:
- Loosen the stem faceplate bolts and remove the old bar.
- Clean the clamp area and apply a light film of grease.
- Seat the new bar and center it by eye against the stem.
- Tighten the faceplate bolts in a cross pattern, a little at a time.
- Set your lever and grip positions, then torque to spec.
- Check that the bar cannot rotate under firm hand pressure.
Conclusion
Swapping heavy steel for a lighter bar is one of the cheapest, most noticeable upgrades you can make to a fixed gear. The challenge is choosing the right material and clamp size so the bar fits and feels better. Get those two things right and the weight savings show up immediately in how the bike accelerates and handles.
Frequently Asked Questions
What is the weight difference between steel and alloy handlebars?
A typical steel handlebar weighs between 400 and 600 grams, while an aluminum alloy bar of similar shape usually lands between 250 and 350 grams. That 150 to 250 gram savings is noticeable when you're accelerating or climbing on a fixed gear, because you feel every gram on a bike with no derailleur or freewheel to mask the effort. Switching to alloy is one of the cheapest weight reductions you can make, often for under $30.
Are carbon fiber handlebars worth the investment for fixed gear bikes?
Carbon bars can weigh under 200 grams and damp road vibration better than alloy, but they cost several times more and can fail catastrophically after a crash or over-torqued clamp bolt. For most fixed gear riders logging commuter or weekend miles, a quality alloy bar delivers most of the weight savings at a fraction of the price. Carbon makes sense if you're chasing every gram and inspect your gear after every knock.
How do I choose the right handlebar width for my fixed gear?
Measure your shoulder width from the bony points at the front of each shoulder. That number in centimeters is your starting point: most riders want a bar within 2 cm of shoulder width. Narrower bars (38-40 cm) slice through traffic and tighten your steering, while wider bars (42-44 cm) open your chest for breathing and give more leverage for sprinting. Bar width also changes reach, so test one size before committing.
Can I install alloy handlebars myself, or do I need a shop?
You can install handlebars at home with a 4, 5, or 6 mm Allen wrench, depending on your stem bolts. Loosen the stem faceplate, slide the old bar out, transfer your brake lever and grips, then set the new bar so the drops or horns sit level. Tighten the faceplate bolts in a cross pattern to the torque stamped on the stem, usually 5 to 6 Nm. A torque wrench costs about $30 and prevents cracking an alloy bar from overtightening.