How to Choose Alloy Bike Handlebars for Comfort

Table of Contents
- Why Alloy Handlebars Deserve a Second Look for Comfort
- Handlebar Sweep and Rise Explained: The Angles That Decide Comfort
- How to Measure Bike Handlebar Width for Your Shoulders
- Reducing Hand Numbness While Cycling With the Right Setup
- Alloy vs Carbon: Vibration Damping and Real-World Trade-offs
- Matching Alloy Handlebars to Your Riding Style and Bike Type
- Common Mistakes When Choosing Alloy Bike Handlebars
- Conclusion
- Frequently Asked Questions
Last Updated: September 23, 2026
Why Alloy Handlebars Deserve a Second Look for Comfort
Comfort on a bike starts at your hands. If your wrists go numb or your palms ache after an hour, the problem is usually your contact points, and the handlebar is the biggest one. This guide from Health and Fitness Company explains how to choose alloy bike handlebars for comfort, from width and sweep to materials and setup.
Handlebar Sweep and Rise Explained: The Angles That Decide Comfort
Sweep is how far the bar ends bend back toward you. Rise is how far the bar bends upward from the clamp. Together, these two angles set your wrist and shoulder position.
- Backsweep: 8-9 degrees suits most riders; more helps wrist pain
- Upsweep: 4-6 degrees is typical on flat and alt bars
- Rise: 0-20 mm changes your posture without a new stem
How to Measure Bike Handlebar Width for Your Shoulders
Handlebar width should match your shoulder width. A bar that's too wide spreads your arms and strains your upper back. Too narrow and your breathing feels tight.
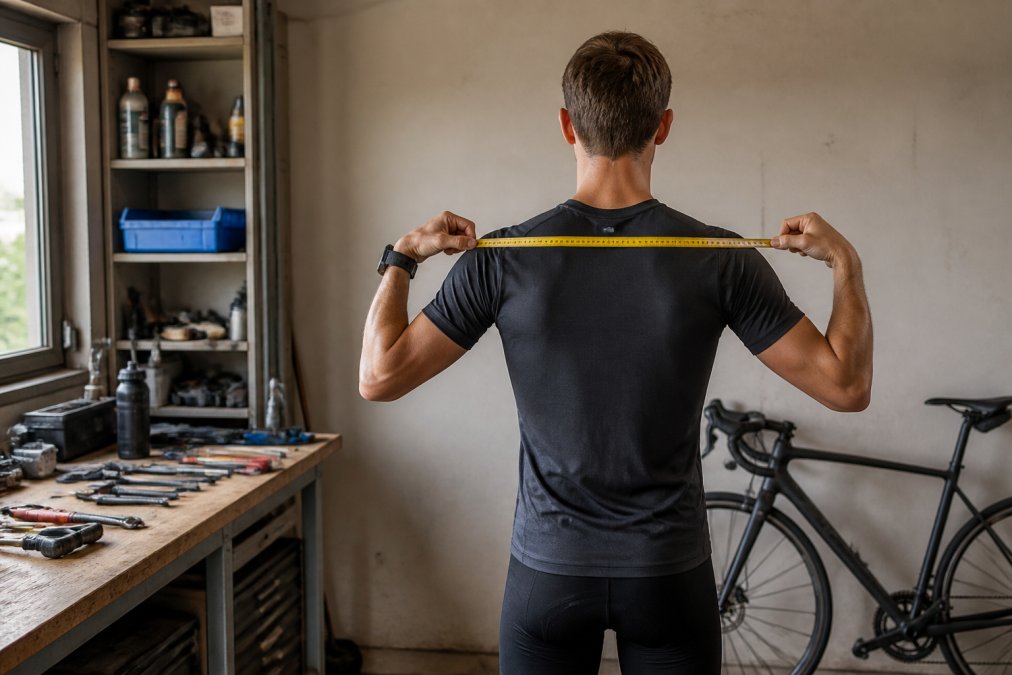
Here's the simple method:
- Stand relaxed against a wall.
- Have a friend measure across your shoulder bones.
- Add roughly 2 cm for road riding, or 4 cm for trail control.
Reducing Hand Numbness While Cycling With the Right Setup
Hand numbness is not a mystery and it is not something you have to live with. It is a mechanical problem with a mechanical fix, and the fix starts with knowing which nerve you are irritating.
The Two Nerves That Cause Most Cycling Hand Numbness
- Ulnar nerve. Runs along the outside of your palm toward your pinky and ring fingers. Compression here causes numbness or tingling in the pinky side of the hand. This is the most common cycling complaint, and it is almost always caused by too much weight concentrated on the heel of the palm with the wrist bent.
- Median nerve. Passes through the carpal tunnel on the thumb side of the wrist. Compression causes numbness in the thumb, index, and middle fingers. This pattern usually points to a wrist angle that is too extended (bent backward) or a bar that forces your hands into a narrow, pinched position.
If you can name which fingers go numb, you can usually name the fix. Pinky-side numbness points to palm pressure and grip width. Thumb-side numbness points to wrist angle and lever position.
Mapping Your Pressure Points to Bar Geometry
Before you buy anything, do a five-minute pressure check on your current bike. Ride for 20-30 minutes, then notice exactly where your hands hurt and which fingers tingle. That map tells you what to change:
- Pain in the heel of the palm, pinky-side tingling. You need more backsweep (try 9-12 degrees instead of 8) or a wider grip so your hands are not pinched together. On flat bars, an ergonomic wing grip moves the load off the ulnar nerve.
- Pain across the base of the thumb, thumb-side tingling. Your wrist is bent too far back. Rotate the bar slightly, raise the levers so your wrist sits straighter, or add rise to lift your chest and reduce the weight on your hands.
- Pain in the center of the palm with no tingling. This is usually a bar diameter or tape problem, not a nerve problem. A thicker tape wrap or a bar with a larger grip section spreads the load.
- Numbness that appears only after 60+ minutes. This is cumulative pressure, not a fit error. The fix is hand position variety, not a new bar.
Setup Adjustments That Actually Work
Work through these in order. Most riders solve their numbness before they reach the bottom of the list:
- Check saddle position first. A saddle that is too far forward or tilted nose-down dumps weight onto your hands. Move it back 5-10 mm and level it before you touch the bar.
- Rotate the bar slightly. A 2-3 degree rotation changes wrist angle without changing reach. Mark your current position with tape so you can return to it.
- Reset lever position. Your wrists should be straight, not bent, when your hands are on the hoods or grips. Loosen the lever clamp, slide it, and retighten.
- Add tape or grips. A 3.5-4 mm gel tape on drop bars, or a soft ergonomic lock-on grip on flat bars, spreads pressure across the palm.
- Change hand position every 10-15 minutes. Tops, hoods, drops, and the flat section behind the hoods all load different parts of the hand. Variety is the cheapest numbness fix there is.
- Stand and reset every 20-30 minutes. This restores blood flow and takes all weight off your hands for a few seconds.
Why This Matters More on Alloy Bars
Alloy transmits more high-frequency vibration than carbon, and that vibration accelerates the fatigue that makes pressure feel worse. On an alloy bar, the pressure-mapping work above matters more, not less. Get the geometry right first, then use tape, grips, and gloves to soften what is left. A bar with mild backsweep and a grip section that lets you rest your palms without pinching will do more for your hands than any material upgrade.
Alloy vs Carbon: Vibration Damping and Real-World Trade-offs
Carbon damps vibration better than alloy. That is the honest truth, and any guide that tells you otherwise is selling something. But the size of that gap depends far more on your setup than on the material label on the bar.
| Factor | Aluminum Alloy | Carbon Fiber |
|---|---|---|
| Vibration damping | Moderate; transmits more high-frequency buzz | High; resin matrix absorbs more buzz |
| Failure mode | Bends or dents; rarely shatters | Can crack or delaminate on impact |
| Weight | Heavier per bar | Lighter per bar |
| Price | Low | High |
| Repairability | Often rideable after a minor crash | Usually replace after a hard impact |
| Best for | Budget builds, trail, touring, commuters | Racing, long road rides, weight-focused builds |
Alloy-Specific Damping Techniques That Close the Gap
- Bar tape thickness and compound. Moving from a thin 2.5 mm tape to a 3.5-4 mm gel-backed tape is the single biggest alloy comfort upgrade. The gel layer converts vibration into a small amount of heat instead of passing it to your palms. Expect to spend $25-$45 on a quality gel tape.
- Gel inserts or a second wrap. A foam or gel strip under the tape at the tops and hoods adds another damping layer without changing your reach much. A double wrap adds roughly 2-3 mm to the effective bar diameter, which also spreads palm pressure.
- Gloves with a padded palm. A 3-5 mm gel or foam palm pad does the same job as tape but on the moving side of the contact point. This is often the cheapest single fix.
- Tire volume and pressure. Dropping from 28 mm to 32 mm tires, or running 3-5 psi less in your existing tires, changes the vibration reaching the bar more than most riders expect. This is the highest-leverage change on the list and it costs nothing.
- Grip choice on flat and riser bars. Lock-on grips with a soft durometer compound and a slight ergonomic wing spread pressure across the palm instead of concentrating it on the ulnar nerve.
Our Outdoor Sports Cycling Gloves add a non-slip padded palm and a touchscreen fingertip for mid-ride phone checks, which pairs well with a thicker tape wrap on an alloy bar.

Matching Alloy Handlebars to Your Riding Style and Bike Type
Your riding style decides your bar shape. There's no single best pick.
- Road: drop bars, 38-42 cm, mild flare for control
- Mountain: flat or riser bars, 760-800 mm, more backsweep
- Gravel: drop bars with 12-16 degrees of flare
- Commuting and folding: upright alt bars for a relaxed posture
Common Mistakes When Choosing Alloy Bike Handlebars
The biggest mistake is copying someone else's setup. Your shoulders, wrists, and bike are not theirs.
Watch for these:
- Buying on width alone and ignoring sweep
- Choosing a bar too wide for city riding
- Skipping a test ride before cutting anything
- Forgetting lever reach and clamping area
- Assuming heavier always means stronger
Conclusion
Finding comfort on the bike comes down to matching geometry to your body, not chasing the lightest part. Start with width, dial in sweep and rise, and soften vibration with tape and gloves.
Frequently Asked Questions
Do alloy handlebars provide more comfort than carbon fiber?
Carbon fiber absorbs road vibration better than alloy, but alloy handlebars cost far less and hold up to crashes and overtightening. For most riders, pairing alloy bars with quality bar tape and wider tires closes most of the comfort gap. If numbness is your main complaint, geometry and fit matter more than material.
What is the difference between rise and sweep in handlebar comfort?
Rise moves the grips upward, which takes weight off your hands and straightens your back. Sweep angles the grips toward you, keeping your wrists in a neutral position instead of bent. A bar with 15 to 25 degrees of backsweep and modest rise often solves wrist pain that a flat, straight bar causes.
Can changing my handlebars help alleviate shoulder and wrist pain?
Yes. Handlebars that are too wide force your arms outward and load your shoulders; bars that are too narrow crowd your chest. Sweep and rise also affect wrist angle. Matching bar width to your shoulder measurement, then adjusting sweep and rise, removes the two most common sources of shoulder and wrist discomfort.
How does handlebar material affect vibration damping?
Alloy transmits more high-frequency road buzz than carbon, but you can reduce it without switching materials. Thicker bar tape, gel padding under the tape, wider tires at lower pressure, and flexible grips all cut vibration. On alloy bars, these changes often deliver the comfort riders expect from carbon at a fraction of the cost.
Editorial note: This article was written for Health and Fitness Company. Always check your bike's clamp diameter and cable routing before buying a new handlebar.