How to Maintain Alloy Bike Handlebars: A Complete Guide

Table of Contents
- Why Alloy Handlebars Need Regular Maintenance
- Essential Tools for Bike Maintenance
- Step-by-Step Cleaning and Maintenance Routine
- Identifying Signs of Handlebar Fatigue
- Proper Torque Settings for Handlebars
- Inspection for Structural Integrity
- When to Replace Your Alloy Handlebars
- Conclusion
Last Updated: August 25, 2026
Why Alloy Handlebars Need Regular Maintenance
Alloy handlebars are engineered for performance, but they're vulnerable to environmental damage most riders overlook. Unlike steel, aluminum alloy oxidizes when exposed to moisture, sweat, and road salt, creating microscopic corrosion that builds stress fractures and compromises safety. This guide from Health and Fitness Company covers everything you need to maintain alloy bike handlebars. A consistent routine prevents 90% of common issues: basic cleaning, periodic inspection, and knowing when replacement becomes necessary.

Essential Tools for Bike Maintenance
Using improper equipment damages alloy handlebars quickly. Abrasive cleaners and harsh brushes create micro-scratches that accelerate oxidation.
Here's what you need:
- Soft-bristled brush (old toothbrush or dedicated bike brush): Essential for gentle cleaning without scratching the alloy surface
- Mild detergent (dish soap or bike-specific cleaner): Removes sweat and grime without chemical damage
- Degreaser (bike-specific formula): Cuts through oil buildup on grips and handlebar clamp areas
- Clean microfiber cloths: For drying and polishing without leaving lint
- Torque wrench (3-20 Nm range): Critical for setting proper torque specifications on your stem interface
- Allen wrench set: Matches your handlebar clamp bolts (typically 4mm or 5mm)
- Light machine oil or protective coating: Optional but recommended for long-term corrosion prevention
A quality torque wrench is a one-time purchase that protects any handlebar you own. Don't use steel wool, scouring pads, acetone-based cleaners, or pressure washers, these accelerate corrosion and damage the anodized protective coating.
Step-by-Step Cleaning and Maintenance Routine
Cleaning the Handlebar and Grips
Weekly rinsing removes salt, sweat, and road grime before they accumulate. Fill a bucket with warm water and mild detergent. Dip your soft-bristled brush into the solution and gently scrub the entire handlebar surface, paying special attention to where the grips meet the bar and the stem interface.
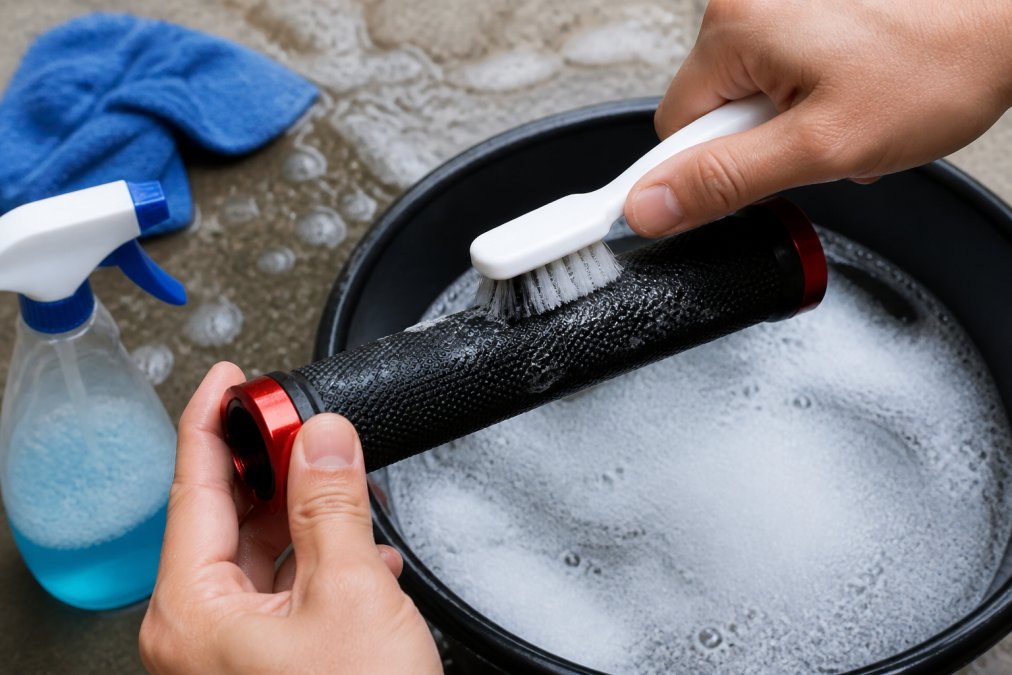
Rinse thoroughly with clean water and dry immediately with a microfiber cloth. Leaving water on aluminum accelerates oxidation, especially in humid or coastal conditions.
Once monthly, apply a light protective coating. A thin layer of machine oil or bike-specific protective spray creates a moisture barrier that slows oxidation. Wipe off excess oil, you want a protective film, not a slick residue that attracts dirt.
Removing Corrosion and Oxidation
Oxidation appears as white or gray powdery buildup on the handlebar surface. For light oxidation, use the soft-bristled brush with mild detergent in circular motions. For heavier corrosion, mix baking soda with water to create a paste, apply it for 5-10 minutes, then scrub gently. Baking soda is mildly abrasive but won't damage the alloy like steel wool.
Rinse thoroughly and dry immediately. Once corrosion is removed, apply your protective coating to prevent recurrence. If you see surface pitting (small holes in the metal), monitor the handlebar closely and consider replacement within the next riding season. Never use vinegar or acidic cleaners on aluminum, they create electrochemical damage that accelerates future corrosion.
Protecting Against Sweat Damage
Sweat is acidic and corrodes aluminum rapidly. Wipe down your handlebars after every ride with a dry microfiber cloth or cloth slightly dampened with fresh water. This 30-second step removes sweat residue before it bonds to the metal.
For riders who sweat heavily, consider bar tape or handlebar covers as a moisture barrier. The Health and Fitness Company Alloy Bicycle Handlebar works perfectly with standard bar tape. In humid climates, store your bike indoors with proper air circulation to prevent condensation from sitting on your bars overnight.
Identifying Signs of Handlebar Fatigue
Structural fatigue develops gradually. Catch early warning signs to prevent crashes and injuries.
Visible cracks or micro-cracks appear as thin lines near the stem interface or where the bar curves. These stress fractures reduce the handlebar's ability to absorb impact and require immediate replacement.
Unusual flex or movement at the stem interface indicates loose clamp bolts or internal damage. Grab your handlebar firmly and try to twist it, there should be zero movement.
Dents or creases in the handlebar wall reduce wall thickness and structural strength. A handlebar with significant denting should be replaced.
Corrosion spreading despite maintenance suggests galvanic corrosion where different metals react together, accelerating material loss.
Pay attention to how your bike feels. If your steering feels less responsive or you notice unusual vibration, inspect immediately.
Proper Torque Settings for Handlebars
Improper torque at the stem interface is the leading cause of handlebar problems. Too loose and your bars will slip; too tight and you'll crack the handlebar or strip threads.
The standard torque specification for most alloy handlebars is 4-6 Nm (Newton-meters) for stem clamp bolts. The Health and Fitness Company Alloy Bicycle Handlebar uses the 4-6 Nm range, which is industry standard.
Here's how to set it correctly:
- Insert your Allen wrench into the clamp bolt
- Place your torque wrench on the Allen wrench
- Tighten slowly until you feel the click or hear the audible signal
- Stop immediately, do not over-tighten
- Repeat for all clamp bolts
Tighten bolts in a cross pattern if you have four bolts to distribute pressure evenly. Check your torque settings every 2-3 months or after any crash or hard impact.
Inspection for Structural Integrity
A monthly inspection takes 5 minutes and catches 90% of handlebar problems before they become dangerous.
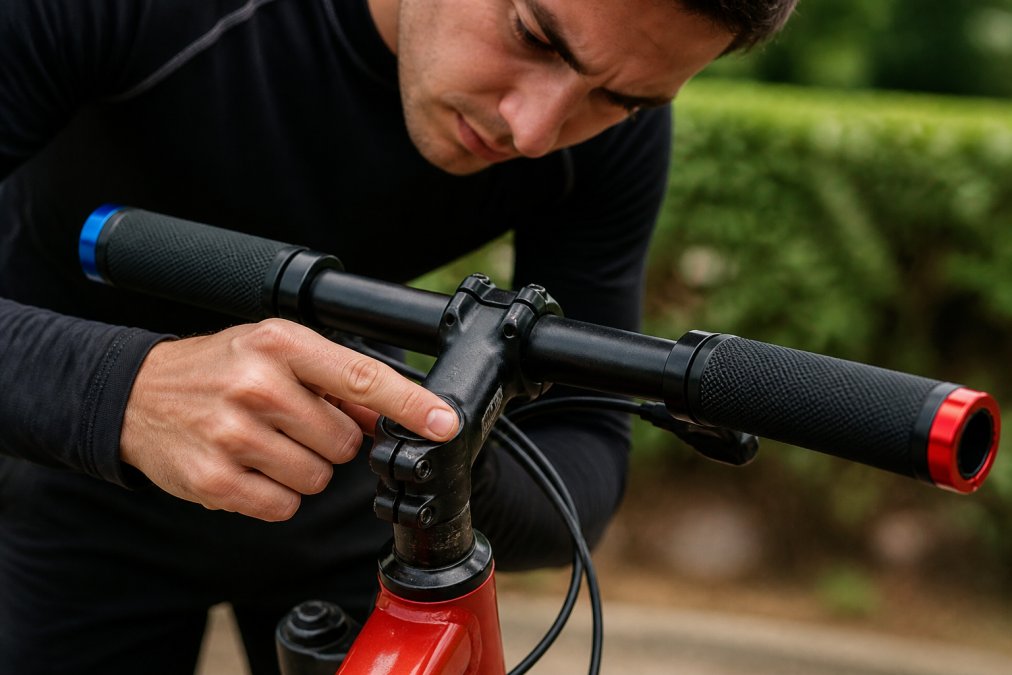
Visual inspection: Look at the entire handlebar surface under good lighting. Check for cracks, dents, or unusual color changes. Pay special attention to the stem interface where stress concentrates.
Feel inspection: Run your fingers along the entire bar length. You'll feel micro-cracks before you see them.
Clamp inspection: Verify that stem clamp bolts are snug but not over-tightened. If a bolt keeps loosening, the clamp threads may be damaged.
Grip inspection: Make sure your grips are secure and not slipping.
Functional test: On a safe, flat surface, grab your bars and try to twist them. There should be zero movement at the stem interface.
Document what you find in a maintenance log to spot patterns over time.
When to Replace Your Alloy Handlebars
Even with perfect maintenance, alloy handlebars eventually reach the end of their service life.
Replace immediately if:
- You see visible cracks or stress fractures
- Your handlebar has significant denting that affects wall thickness
- Corrosion has created deep pitting that compromises structural integrity
- Your clamp bolts won't stay tight despite proper adjustment
- Your handlebar flexes or moves at the stem interface despite proper torque
- You've had a crash or significant impact that you suspect damaged the bar
Consider replacement if:
- Your handlebar is over 5-7 years old (material fatigue accumulates)
- Corrosion keeps recurring in the same areas despite protective measures
- Your grips are worn and the underlying bar is showing damage
- You're upgrading your bike and want fresh components
The Health and Fitness Company Alloy Bicycle Handlebar at $20.76 is an affordable upgrade that gives you a precision-engineered bar designed for durability. When you replace your bars, use the torque settings and maintenance routine outlined in this guide.
Conclusion
Maintaining your alloy bike handlebars is straightforward once you understand what you're protecting against. Oxidation, sweat damage, and stress fractures are predictable problems with clear prevention strategies. A 30-second post-ride wipe-down, monthly inspection, and proper torque settings prevent 95% of handlebar failures.
The Health and Fitness Company Alloy Bicycle Handlebar combines durable alloy construction with ergonomic design and lock-on grips that stay secure through intense training. Pair it with the maintenance routine in this guide, and you'll have handlebars that perform reliably for years.
| Maintenance Task | Frequency | Time Required |
|---|---|---|
| Post-ride wipe-down | After every ride | 30 seconds |
| Weekly cleaning | Once per week | 5-10 minutes |
| Monthly inspection | Once per month | 5 minutes |
| Torque check | Every 2-3 months | 10 minutes |
| Protective coating | Monthly | 5 minutes |
| Deep corrosion removal | As needed | 15-20 minutes |
For more detailed guidance on bike component maintenance, check out Park Tool's bicycle maintenance resources, which covers stem installation and torque specifications for all handlebar types. The Bicycle Retailers Association maintenance standards also provides industry-standard guidelines for component care. Additionally, ASTM International standards for bicycle components defines safety specifications for handlebar structural integrity testing.
Frequently Asked Questions
Q: How often should I inspect my alloy handlebars for fatigue?
A: Inspect your alloy handlebars monthly for signs of fatigue, especially if you ride frequently or in humid conditions. Check for micro-cracks, surface pitting, and stress fractures around the stem interface and clamp areas. Regular preventative maintenance catches structural integrity issues before they become safety hazards.
Q: Can alloy handlebars corrode over time?
A: Yes, alloy handlebars can corrode through oxidation and galvanic corrosion when exposed to moisture and sweat. Anodized coatings provide protection, but they can wear down. Regular cleaning with mild detergent and a soft-bristled brush prevents electrolyte buildup from sweat. Dry your handlebars after wet rides and apply a moisture barrier like bar tape or a protective coating to extend component longevity.
Q: What is the best way to clean aluminum bike parts?
A: Clean aluminum handlebars with warm water and mild detergent using a soft-bristled brush. Avoid abrasive cleaners and steel wool, which damage the anodized surface. For stubborn oxidation, use a specialized degreaser formulated for bike components. Dry thoroughly with a clean cloth and apply a clear coat or protective oil to maintain the finish. Never use harsh chemicals that compromise structural integrity.
Q: Does sweat damage alloy bike handlebars?
A: Sweat contains electrolytes that accelerate corrosion on unprotected alloy surfaces. Sweat damage appears as pitting and oxidation on the handlebar and stem interface. Prevent sweat damage by using bar tape as a moisture barrier, wiping down your handlebars after rides, and applying a protective coating. Regular cleaning removes salt deposits before they cause surface pitting or galvanic corrosion.
This article was written using GrandRanker