Weighted Bands for Pilates: A 2026 Routine Guide

Table of Contents
- Why Weighted Bands Change Your Pilates Routine
- Benefits of Weighted Wrist Bands for Pilates
- Pilates Resistance Band Exercises for Beginners
- How to Choose the Right Weighted Bands and Resistance Level
- Building a Strength Training Equipment Set for Pilates
- Safety, Form, and Common Mistakes
- Frequently Asked Questions
Last Updated: September 22, 2026
Why Weighted Bands Change Your Pilates Routine
Weighted bands for a Pilates routine solve a specific problem: elastic bands get easier as you stretch them, but weighted bands keep constant tension from the first rep to the last. At Health and Fitness Company, we build adjustable weighted wrist and ankle bands for exactly this reason, elastic resistance peaks at the end range, while added weight stays consistent.

| Tool | Resistance Type | Best For | Tension Behavior |
|---|---|---|---|
| Weighted wrist/ankle bands | Constant gravitational load | Glute activation, arm toning, isometric holds | Consistent through range |
| Elastic resistance bands | Variable tension | Mobility, stretching, assisted pull-ups | Increases as stretched |
| Pilates bar + band | Combined use + elastic | Full-body standing work | Variable, guided by bar |
Benefits of Weighted Wrist Bands for Pilates
The benefits of weighted wrist bands for Pilates come down to one mechanism: they add load without adding complexity. You strap them on and every arm raise, leg lift, and hold gets heavier. No anchor point, no door frame, no setup.
Other practical gains:
- Posture correction: Loaded arm movements reinforce scapular control and upper back engagement.
- Glute activation: Ankle bands during bridges and clamshells increase hip abductor recruitment.
- Joint health: Low-impact loading supports tendon and ligament conditioning without the joint stress of heavy lifting.
- Body awareness: The added weight gives your nervous system clearer feedback about limb position.
Weighted vs. Elastic Resistance: How They Differ
Elastic resistance is variable: the further you stretch the band, the harder it pulls. Weighted resistance is constant: a two-pound wrist band weighs two pounds whether your arm is at your side or overhead.
Pilates Resistance Band Exercises for Beginners
Pilates resistance band exercises for beginners should start simple and stay controlled. The eight moves below cover the full body, grouped by target muscle, and work with either elastic or weighted resistance, though the cues change. With weighted bands, the load sits at the end of the limb, so stabilizer muscles around the joint work harder.
Core and Deep Stabilizers
- Dead bug with wrist weights. Lie on your back, arms extended toward the ceiling, knees at 90 degrees. Lower one arm and the opposite leg toward the floor, pause, return. Ten reps per side. The distal load forces the deep abdominals to resist extension.
- Standing anti-rotation press. Loop a long elastic band around a sturdy anchor at chest height. Hold the handle at your sternum, press straight out, and resist the pull that wants to rotate your torso. Twelve reps per side. This trains the obliques and quadratus lumborum isometrically.
Glutes and Hips
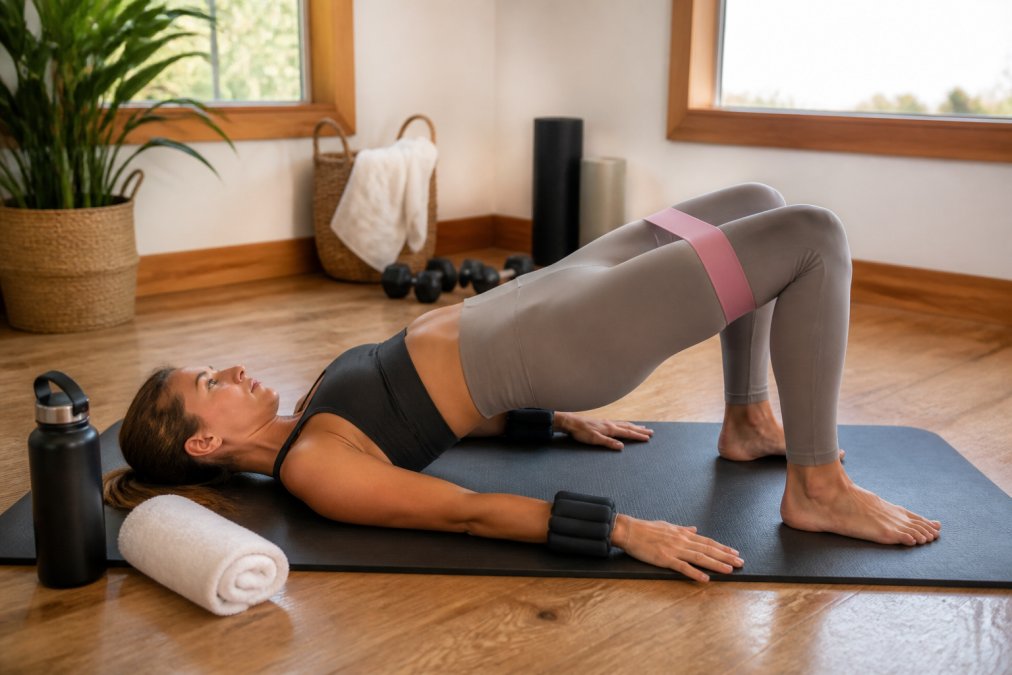
- Glute bridge with ankle band. Lie on your back, knees bent, band above the knees. Press hips up, hold two seconds, lower with control. Ten reps. Keep the ribs stacked over the pelvis, if the low back arches, the glutes have handed the work to the lumbar spine.
- Standing side leg lift. Loop the band around your ankles. Lift one leg out to the side against tension. Twelve reps per side. The hip abductors (gluteus medius and minimus) are the primary movers; most people feel this in the outer hip, not the front of the thigh.
- Clamshell. Side-lying, band above knees, open and close the top knee slowly. Fifteen reps per side. Pause one second at the top of each rep, the pause is where the glute medius actually fires.
Shoulders and Upper Back
- Wrist-weighted arm circles. Small controlled circles with arms extended. Thirty seconds each direction. Keep the shoulder blades down and back. The rotator cuff works as a stabilizer here, not a primary mover, light load and high control beat heavy load and speed.
- Standing row with band. Anchor the band, pull toward your ribs, squeeze shoulder blades. Twelve reps. Think of the elbow moving past the rib cage rather than the hand pulling, that cue shifts the work from the biceps to the mid-back.
Full-Body Integration
- Standing band press-out with weighted wrists. Loop a long elastic band behind your back at chest height, press both arms forward, and hold for two seconds. Twelve reps. This is the closest mat equivalent to a reformer long-box series: the elastic challenges the press, the wrist weights challenge the return.
For beginners, the priority is breath control and alignment, not load. Add weight only after you can complete every rep without your form shifting. If you cannot hold the top position for a full breath without the band sliding or the joint wobbling, the load is too heavy today.
How to Tell Which Muscle Group Is Working
A common beginner mistake is assuming a move works the muscle it looks like it works. Two quick checks:
- Glute moves: You should feel the burn in the outer hip or the back of the hip, not the front of the thigh or the low back. If the front of the thigh dominates, the hip flexors are taking over, reduce the range of motion.
- Shoulder moves: You should feel the work between the shoulder blades and in the back of the shoulder, not the front of the shoulder joint. If the front of the shoulder pinches, the load is too far forward, bring the arm slightly behind the plane of the body.
How to Choose the Right Weighted Bands and Resistance Level
Choosing the right weighted band comes down to two variables: weight increment and fit. Adjustable bands beat fixed-weight bands for almost everyone, because your strength changes across muscle groups and across weeks.
- Adjustable closure so the same band fits wrist and ankle
- Sweatproof, waterproof material so it does not degrade with repeated use
- Even weight distribution so the load does not pull to one side
- Secure grip that holds through dynamic movement
Building a Strength Training Equipment Set for Pilates
A strength training equipment set for Pilates does not need to be large. It needs to cover four jobs: elastic resistance, weighted resistance, use, and support.
Adjustable Weighted Fitness Wrist and →

Here is what a complete home setup looks like:
| Piece | Job | Example |
|---|---|---|
| Weighted wrist/ankle bands | Constant load for arms, glutes, holds | Health and Fitness Company adjustable bands |
| Long elastic band | Mobility, stretching, assisted work | Health and Fitness Company strength resistance band |
| Pilates bar + band | Standing full-body work, chest, abs | Health and Fitness Company portable Pilates bar |
| Mat and towel | Support, alignment, hygiene | Any quality non-slip mat |
Safety, Form, and Common Mistakes
Safety with weighted bands is mostly about progression and placement, not the bands themselves. The load is light by design. Problems come from adding weight too fast, wearing bands in the wrong position, or using them for movements they were not built for. What most guides skip is the biomechanics: a one-pound weight at the wrist is not the same as one in the hand, and a one-pound weight at the ankle is not the same as one in a backpack. The lever arm changes everything.
The Lever Arm Problem
When you strap a weight to your wrist and extend your arm, the weight sits roughly 20 to 24 inches from your shoulder joint. The torque it produces is the weight multiplied by that distance. Move it to your ankle and extend the leg, and the distance from the hip can be 30 inches or more. That is why ankle weights feel dramatically heavier than wrist weights of the same nominal poundage, and why a move that feels easy on the wrist can feel punishing on the ankle.
Placement Rules That Actually Matter
- Weight sits on the muscle belly, not the joint. A band that slides down onto the wrist bone or the ankle bone concentrates load on a structure that has almost no muscle to absorb it. Check placement before every set, not just at the start of the session.
- Closure should be snug but not tight. You should be able to slide one finger under the strap. A closure that leaves a mark is too tight; one that rotates during a rep is too loose.
- Match the band to the limb. A wrist band worn on the ankle will fit, but the weight distribution is wrong, the load will pull to one side of the ankle. Use the band as designed.
The Mistakes I See Most Often
- Skipping the warm-up. Cold muscles under load do not move well. Five minutes of mobility first, arm circles, hip openers, and a few bodyweight bridges.
- Chasing weight over control. If your range of motion shrinks when you add weight, you added too much. Range of motion is the first thing to go and the last to come back.
- Ignoring one side. Asymmetry shows up fast with distal load because the lever arm amplifies any difference in control between sides. Match reps and tempo on both sides, and if one side fatigues first, stop the set there.
- Wearing them all day. These are training tools, not everyday accessories. Walking around the house in ankle weights adds cumulative load to the knee and hip without any training benefit.
- Using them for high-impact work. The added load at the end of the leg increases stress on the knee and hip during running, jumping, or plyometrics. Save weighted bands for controlled, low-impact movement.
Form Cues That Transfer to Every Move
Keep the ribs stacked over the pelvis. Breathe out on effort. Stop the set when alignment breaks, not when the rep count is done. Those three cues cover most of what goes wrong with weighted bands, because the failure mode is almost always the same: the load pulls the body out of alignment, and the practitioner keeps going to finish the rep count.
When to Check With a Physical Therapist
For anyone with a history of joint injury, recent surgery, or who is currently in rehabilitation, check with a physical therapist before adding load to a Pilates routine. Physical therapists use distal loading, wrist and ankle weights, in rotator cuff and shoulder stability work precisely because it recruits stabilizer muscles that free weights often bypass. That is a feature, not a bug, but it also means the load reaches structures that are still healing.
Care and Maintenance
Wipe the bands after each session with a damp cloth. Keep them out of direct sun, UV degrades the silicone and elastic over time. Check the closure and stitching monthly, and replace any band where the stitching frays or the closure no longer holds under tension. Well-made bands last years; neglected ones fail early, and a band that fails mid-rep is a safety problem, not just an inconvenience.
Frequently Asked Questions
What kind of resistance bands do I need for Pilates?
For Pilates you generally want two types: a long elastic band or tube for standing and seated work, and a short loop band for glute and hip activation. If you plan to add external load, adjustable weighted bands for wrists and ankles let you increase resistance in small steps. The Health and Fitness Company Strength Resistance Band comes in five thicknesses from 0.35mm to 1.1mm, so you can move up as your control improves without buying a whole new set.
Do weighted bands provide better results than standard resistance bands?
They do different jobs. Elastic bands increase tension as you stretch them, which builds strength through a range of motion and suits mobility work. Weighted bands add constant load, so the muscle works the same amount at the start and end of a rep, which is closer to dumbbell training. Many Pilates routines use both: elastic bands for warm-ups and mobility, weighted bands for the strength and stability portion. Which one gives better results depends on whether your goal is range of motion or raw load.
How do you incorporate weighted wrist and ankle bands into a Pilates flow?
Put them on after your warm-up, not before. Use them for the middle third of the session on moves like leg lifts, clamshells, glute bridges, arm circles, and standing leg extensions. Take them off for the final stretching and breath work so your joints finish the session unloaded. Start with the lightest setting for two weeks, then add one increment. If your form breaks down or your lower back takes over, drop back a level.
Are weighted bands safe for beginners in Pilates?
Yes, if you start light and keep the load adjustable. Beginners should begin with the lowest weight setting and focus on alignment and breath control before adding resistance. The main risk is progressing too fast, which shifts the work from the target muscle to the lower back or hip flexors. Stop if you feel joint pain rather than muscle fatigue. The Adjustable Weighted Fitness Wrist and Ankle Band at $91.03 lets you add or remove weight in small steps, which is safer than fixed-weight gear.