Are Weighted Wrist Bands Good for Beginners? A How-To Guide

Table of Contents
- What Weighted Wrist Bands Actually Do for a Beginner
- How to Use Weighted Wrist Bands Safely
- Best Weight for Wrist Bands: A Beginner's Guide
- Benefits of Wrist Weights for Walking
- A 4-Week Progression Roadmap for Beginners
- Choosing the Right Weighted Wrist Bands
- Conclusion
- Frequently Asked Questions
Last Updated: September 11, 2026
What Weighted Wrist Bands Actually Do for a Beginner
Weighted wrist bands are wearable fitness accessories that add small amounts of resistance to your arms during everyday movement, walking, or bodyweight exercise. For beginners, they are a low-impact way to increase muscle endurance and body awareness without touching a dumbbell. This guide from Health and Fitness Company explains how to start, what weight to choose, and where the risks lie.

Are weighted wrist bands good for beginners? Yes, with two conditions: keep the load light, and treat them as a conditioning tool rather than a strength-building one.
That distinction matters. A common mistake is assuming that strapping weight to your wrists turns a walk into a workout. It doesn't build meaningful muscle mass. What it does is raise the demand on your shoulders, forearms, and core stabilizers over hundreds of repetitions, which is a different training stimulus entirely. The American Council on Exercise guide to wearable resistance makes a similar point: light wearable load changes endurance and motor control, not raw strength.
The payoff is real, though. Beginners who add small loads to walking or bodyweight circuits often report that their arms and shoulders feel more engaged, and that they notice their posture more. That feedback loop is the actual benefit.
How to Use Weighted Wrist Bands Safely
Safe use comes down to three variables: load, duration, and progression speed. Get them right and injury risk stays low; get them wrong and you're looking at elbow tendon irritation or shoulder strain within weeks.
Start with the lightest band you can find, wear it for short sessions, and increase one variable at a time. Never increase weight and duration in the same week.
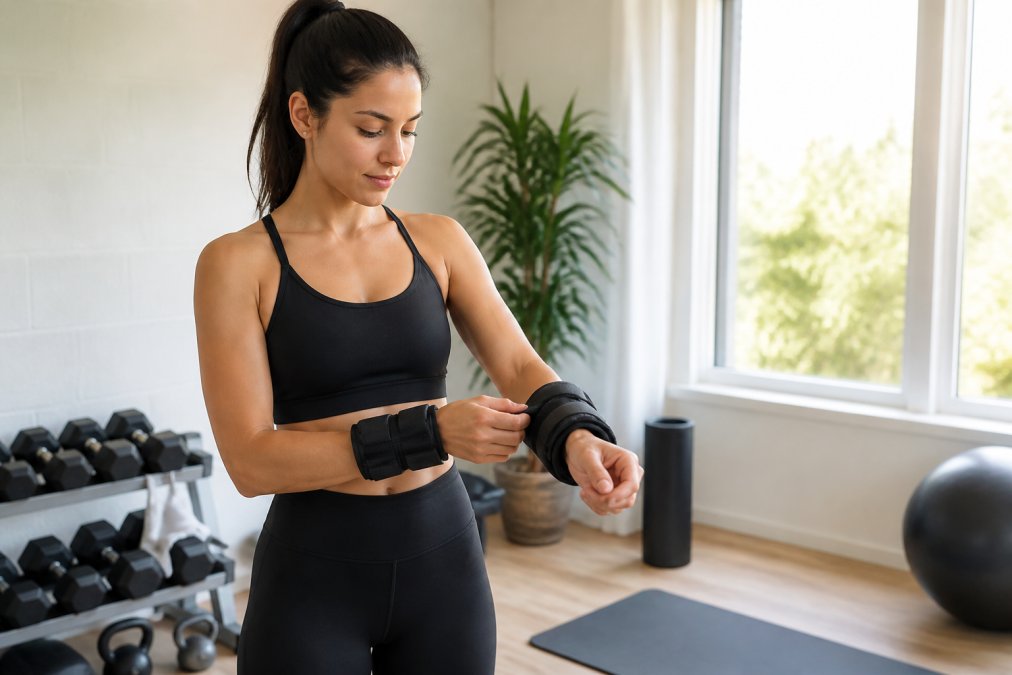
Start With a 10-Minute Session and a 1-Pound Band
Ten minutes is enough for your first two weeks. Your joints and connective tissue adapt more slowly than your muscles, so the early goal is tolerance, not fatigue.
A simple beginner protocol:
- Wear 1-pound bands for a 10-minute walk, three times in week one
- Keep your arms relaxed and swinging naturally, not held stiff
- Stop at 10 minutes even if it feels easy
- Log how your elbows and shoulders feel the next morning
- Add 5 minutes only after two consecutive sessions with no soreness
If you're coming from a completely sedentary baseline, cut that to 5 minutes. There is no prize for rushing this.
Watch for These Warning Signs
Stop immediately if you feel sharp elbow pain, a pinching sensation at the front of the shoulder, or numbness and tingling in your fingers. Those point to nerve compression or tendon irritation, not muscle fatigue.
Dull forearm soreness the next day is normal. Pain that persists past 48 hours, or shows up during the session itself, is not. Wrist and elbow tendons handle repetitive load poorly, and repetitive strain injuries from light weights are more common than people expect precisely because the load feels harmless (peer-reviewed research).
Best Weight for Wrist Bands: A Beginner's Guide
The best weight for wrist bands is 1 to 2 pounds for beginners, staying under 3 pounds for the first several months. Anything heavier shifts the load from endurance work into joint stress without proportional benefit.
Here's how to think about it by starting point:
| Your Starting Point | Recommended Weight | Session Length | Progression Pace |
|---|---|---|---|
| New to exercise entirely | 0.5-1 lb | 5-10 min | Add 5 min every 2 weeks |
| Walks regularly, no weights | 1-2 lb | 10-20 min | Add weight after 3 weeks |
| Does bodyweight training | 2-3 lb | 15-25 min | Add weight every 3-4 weeks |
| Returning from injury | 0.5-1 lb | 5 min | Only with clinician approval |
The pattern is consistent: lighter than you think, longer before you progress. Beginners almost universally overestimate what their wrists can tolerate.
Benefits of Wrist Weights for Walking
Wrist weights for walking add resistance to an activity you already do, making them one of the easiest entry points into resistance training. The benefits are modest but genuine: more muscle endurance in the arms and shoulders, better posture awareness, and a slightly higher calorie burn.
What they won't do is replace a proper strength program. Expect a small increase in caloric expenditure, not a dramatic one. The load is simply too light to move the needle much on metabolic rate.
Where walking with wrist weights genuinely shines is upper body conditioning for people who can't or won't do push-ups and rows. It's low-impact exercise that builds tolerance in the shoulders and forearms over time, the foundation everything else gets built on.
A practical walking setup:
- Wear the bands on both wrists, not one
- Keep the weight even on both sides to avoid gait mechanics problems
- Walk at your normal pace; don't shorten your stride to compensate
- Cap sessions at 30 minutes until you're comfortable at 20
If your shoulders start hiking up toward your ears, the weight is too heavy. That's your signal to drop down a size.
A 4-Week Progression Roadmap for Beginners
A structured ramp beats random use every time. This four-week plan moves you from a single 10-minute session to 25-minute sessions with a moderate load, without spiking joint stress, and includes the movements and form cues most beginner guides skip.
The 5-Minute Beginner Routine (Use This Every Session)
Before adding duration or load, get comfortable with this circuit. Do it with 1-pound bands, once through, resting as needed. Total time is about five minutes.
- Arm swings (60 seconds). Stand tall, arms at your sides, and swing them forward and back naturally as if walking in place. Keep elbows soft, not locked. The band should move with your arm, not bounce against your wrist. Form cue: if your shoulders creep up toward your ears, drop the weight or shorten the swing.
- Shoulder rolls (45 seconds). Roll your shoulders forward in slow, full circles, then backward. This warms the joint and teaches you where the band sits when your arm is in motion. Form cue: keep the motion in the shoulder, not the neck.
- Controlled wrist curls (60 seconds). Palms up, elbows tucked at your sides, curl your wrists toward your forearms and lower slowly. This is the one move where the band's weight is fully on the wrist joint, so keep the range small, about half of what feels possible. Form cue: stop if you feel a pinch at the front of the elbow.
- March in place with arm drive (90 seconds). March with a normal stride and let your arms swing. This is the closest thing to the walking motion you'll do outside, and it exposes any fit problems before you're a mile from home. Form cue: don't shorten your stride to compensate for the weight.
- Standing posture hold (45 seconds). Stand with arms relaxed, band on, and simply notice where your shoulders sit. This is the proprioception piece, the actual skill wrist bands train. Form cue: ribs down, chin level, no rigid posing.
If any single move causes sharp pain, skip it and note which one. That's diagnostic information, not failure.
Week 1: Tolerance
Three sessions of the 5-minute routine above, plus a 10-minute walk with 1-pound bands. No other changes. Your only job is to finish each session and check in the next morning. If you're completely sedentary, cut the walk to 5 minutes.
Week 2: Duration
Three 15-minute walks with the same 1-pound bands, plus the 5-minute routine before the first walk of the week. If week one left you sore, repeat it. Don't add weight yet, duration and load are separate variables for a reason.
Week 3: Frequency
Four 15-minute sessions. Add one light bodyweight circuit on two of those days: arm circles, shoulder rolls, and slow wrist curls with no added weight. The goal is tolerance, not fatigue.
Week 4: Load
Three 20-minute sessions at 1.5 to 2 pounds. Keep one session per week at the lighter weight to give your tendons a break. If the 2-pound bands change your walking posture, shoulders hiking, arms held stiff, drop back to 1.5 for another week.
How to Know You're Ready to Move On
You're ready for the next step when you can complete your current sessions with no next-day soreness, no numbness or tingling during the session, and no change in your natural walking posture. If any of those three break down, repeat the week, that's the entire point of a progression roadmap.
Choosing the Right Weighted Wrist Bands
Most beginner guides stop at "get adjustable bands." That advice is correct but incomplete. The material touching your skin and how weight is distributed around your wrist determine whether you'll actually wear the bands past week two, chafing, sliding, and hot spots are why most beginners quit.
Material: Neoprene vs. Silicone vs. Fabric-Wrapped
Neoprene is the most common shell material. It's soft, slightly stretchy, and grips skin well enough that the band doesn't rotate during a walk. The trade-off is breathability: neoprene traps sweat and can leave a damp ring around your wrist after a 20-minute session in warm weather. If you run hot or live somewhere humid, wipe the bands down after every session and let them air-dry fully.
Silicone or rubberized shells resist sweat and wipe clean in seconds, making them the better pick for bodyweight circuits on a mat. They don't absorb odor the way fabric does. The downside is grip: silicone against bare skin can feel clammy and may tug at arm hair. A thin athletic sleeve underneath solves this.
Fabric-wrapped bands (usually a nylon or polyester outer layer over a weighted core) breathe best and feel most like clothing, the most comfortable option for long walks. The catch: fabric holds moisture and needs washing, and repeated washing can shift the weighted inserts. Check that inserts are individually secured, not dropped into one long channel.
A practical rule: neoprene for walking in mild weather, silicone for sweaty circuits, fabric for long-duration wear. If you only buy one pair, neoprene is the safest middle ground.
Fit and Weight Distribution
A band that slides or bunches concentrates force on one spot, and that spot becomes the injury site. Two fit details matter more than any marketing claim:
- Closure type. Hook-and-loop (Velcro-style) is adjustable but degrades, the hooks clog with lint and the strap loosens mid-session. Buckle or D-ring closures hold tension better over months of use but offer fewer micro-adjustments. For beginners whose wrist size won't change much, a buckle is the more durable choice.
- Weight placement. Look for bands with multiple small pockets distributed around the circumference rather than one large pocket on top. Even distribution keeps the band from rotating and prevents a single pressure point from digging into the wrist bone.
A Quick Fit Test Before You Buy
You can't always try bands on before purchase, but you can check three things in the product photos and description:
- Does the band list a wrist circumference range, not just "one size fits most"? A range tells you the manufacturer actually sized it.
- Are the weights removable? Removable inserts let you start at half the rated load, which matters for the first two weeks.
- Is the closure replaceable or repairable? Cheap bands fail at the strap, not the weight.
The National Academy of Sports Medicine guidance on resistance training equipment emphasizes fit and load distribution as key factors in preventing overuse injury, which is exactly where cheap bands fail.
Health and Fitness Company's [Adjustable Weighted(/blogs/news/adjustable-weighted-bands-home-workouts-guide) Fitness Wrist and Ankle Band | healthandfitnesscomp.com] addresses both the material and distribution issues: the adjustable design lets you start at a light load and add resistance as your tolerance grows, so you're not buying a new set every month. The same bands work on your ankles, which opens up lower-body work once your wrists have adapted. At $91.03, they cost more than a bargain set, but they replace three or four fixed-weight pairs over a year of progression.
Where they fall short: if you only ever plan to walk with 1-pound bands in cool weather, a cheaper fixed neoprene pair will do the same job. The adjustability and material quality only pay off if you actually progress and actually sweat.
Conclusion
The hardest part of starting with weighted wrist bands isn't the training, it's resisting the urge to go heavier than your tendons can handle in the first month. Beginners who progress slowly stay in the game; beginners who chase load end up sidelined with elbow pain.
Health and Fitness Company offers adjustable weighted wrist and ankle bands designed to support your fitness journey. The adjustable resistance lets you start light and scale up as tolerance grows, and the durable construction is crafted for daily wear. The same pair transitions from walking to bodyweight circuits to ankle work. Get started with Health and Fitness Company and build a foundation that lasts past week four.
Frequently Asked Questions
What is the recommended weight for beginners using wrist bands?
Start with 1 pound per wrist and stay under 3 pounds total for the first few weeks. The best weight for wrist bands depends on your current fitness level, but 1 to 2 pounds is a safe range for most beginners. Heavier bands (3 pounds or more) increase joint stress and can throw off your gait mechanics during walking or aerobic activity. If you feel your arms swinging unevenly, drop down a size.
How long should a beginner wear weighted wrist bands?
Begin with 10 to 15 minute sessions, two to three times per week. Gradually build to 30 minutes as your muscle endurance improves. Avoid wearing them for hours at a time, because extended use can cause repetitive strain and soft tissue injury. A good rule: stop when your arms feel fatigued, not when they hurt. Recovery days matter as much as training days.
Will walking with wrist weights tone your arms?
Walking with wrist weights adds resistance to your arm swing, which can improve upper body conditioning and muscle endurance over time. It won't build large muscle mass the way resistance training does, but it does increase caloric expenditure slightly. For visible arm toning, pair walking with wrist weights with a few weekly resistance training sessions that target the shoulders, biceps, and triceps.
Are there risks of joint injury when using weighted wrist bands?
Yes, if you start too heavy or too long. Weighted wrist bands add load bearing to your wrists, elbows, and shoulders, which can aggravate existing rotator cuff issues or cause overuse injury. Beginners should stay under 3 pounds, warm up before use, and stop at the first sign of sharp pain. If you have a history of joint problems, check with a physical therapist before adding wrist weights to your routine.