Benefits of Alloy Bicycle Handlebars: 2026 Guide

Table of Contents
- Why Alloy Handlebars Make Sense for Most Riders
- Alloy vs Carbon: Cost, Durability, and Crash Resistance
- How to Install Bicycle Handlebars Correctly
- Choosing the Best Alloy Handlebars for Mountain Bikes
- Weight, Stiffness, and Vibration Damping: What Actually Matters
- Maintenance, Inspection, and Fatigue Life
- Weight-to-Price and Sustainability: Two Angles Most Guides Skip
- Frequently Asked Questions
Last Updated: September 13, 2026
Why Alloy Handlebars Make Sense for Most Riders
Alloy bicycle handlebars remain the default handlebar choice for good reason: they deliver dependable strength, predictable failure behavior, and a price that leaves room in the budget for the rest of the build. The benefits of alloy bicycle handlebars start with that combination of toughness and affordability, and they extend to how the bar behaves in a crash and how easy it is to inspect for damage.

This guide from Health and Fitness Company breaks down the engineering behind modern alloy bars, where they beat carbon, and how to install and maintain them so they last. If you ride a few times a week and want a cockpit you can trust without babysitting it, alloy is the practical answer.
Alloy vs Carbon: Cost, Durability, and Crash Resistance
The core difference is how each material fails, and that difference comes down to structure. Carbon fiber composite is a layered resin-and-fiber structure. Each ply carries load in one direction, so the material is strong along the fiber axis and comparatively weak between plies. An impact that exceeds the resin's strength can delaminate those layers, separating plies internally, while the outer cosmetic layer still looks intact. That is why a cracked carbon bar can appear fine until it lets go under a hard sprint or a pothole.
Aluminum alloy is isotropic: it behaves the same in every direction. When overloaded, it yields, it bends, dents, or ovalizes at the clamping area, and that deformation is visible. A bent alloy bar tells you to replace it. A carbon bar with hidden delamination does not.
Not all alloy is equal, and this is where most comparison articles stop short:
- 6061-T6 is the workhorse. It is weldable, corrosion-resistant, and inexpensive, which is why it dominates budget and mid-range bars. The T6 temper is a solution heat treatment followed by artificial aging that raises yield strength substantially over the raw alloy (asminternational.org).
- 7075-T6 is stronger and stiffer but less weldable and more expensive, so it shows up in premium bars and stems where the manufacturer can machine rather than weld.
- 2014 and similar high-strength alloys appear in some aerospace-derived bars, but they trade corrosion resistance for strength and usually need a protective finish.
| Factor | Alloy | Carbon |
|---|---|---|
| Weight | Heavier | Lighter |
| Cost | Lower | Higher |
| Failure mode | Yields visibly (bend, dent, ovalize) | May delaminate internally |
| Inspection | Straightforward visual and squeeze check | Requires careful checking, sometimes tap testing |
| Vibration damping | Moderate | Higher |
| Field repairability | Replace, but damage is obvious | Replace, damage may be hidden |
| Recycling | Widely recyclable | Difficult to recycle composite |
Carbon wins on weight and vibration damping. Alloy wins on cost, crash behavior you can actually assess, and peace of mind on a trail bike that gets dropped. For a rider who crashes regularly, the ability to look at a bar and know whether it is safe is worth more than the grams.
How to Install Bicycle Handlebars Correctly
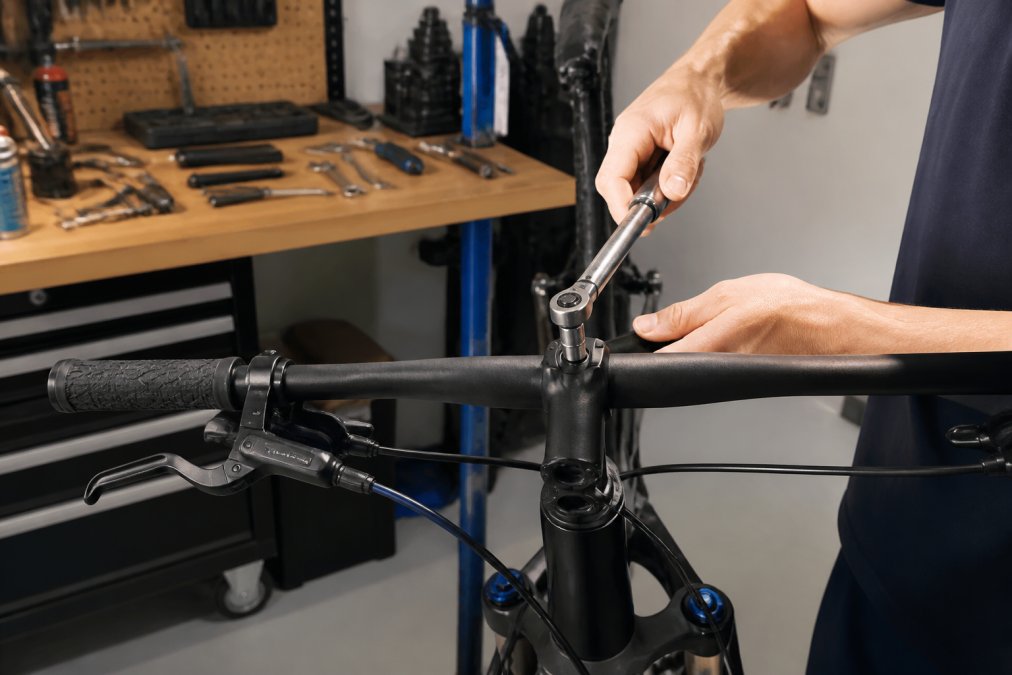
Correct installation comes down to two things: the right torque and the right cable routing. Over-tightening crushes the bar at the clamping area; under-tightening lets it slip under load. Both are avoidable with a torque wrench and a little patience.
Tools and Torque Settings You Need
You will need a torque wrench, a hex key set, and a small amount of assembly paste. Follow the torque value printed on the stem or bar, and never guess. Most alloy bars specify a range, and staying at the low end of it is safer than cranking to the maximum (parktool.com).
Routing Cables and Setting Lever Position
Route cables so they do not kink at the bar or rub the frame. Internal cable routing looks cleaner but is fussier to set up, so many riders stick with external routing for easier maintenance. Set your lever position so your wrists stay neutral, then tighten the controls to their own torque spec. The best alloy handlebars for mountain bikes often ship with a stated rise, sweep, and width, and matching those to your reach and riding style matters more than shaving grams.
Choosing the Best Alloy Handlebars for Mountain Bikes
Mountain biking punishes a cockpit. Wide bars with a sensible rise and sweep give you control on descents, and alloy's impact absorption and resistance to stress fractures make it a smart pick for trail and enduro riding. Match the handlebar width to your shoulder width and terrain, then cut down if needed.
Health and Fitness Company offers an Alloy Bicycle Handlebar for mountain, folding, and design bikes, built from alloy with rubber lock-on grips for comfort and security. At $20.76, it is a low-risk way to upgrade a cockpit without the cost of carbon. Pair it with Outdoor Sports Cycling Gloves at $26.47 if you want a non-slip grip and touchscreen fingertips on cold rides.

Weight, Stiffness, and Vibration Damping: What Actually Matters
Stiffness and weight are not the whole story. A higher stiffness-to-weight ratio helps sprinting performance and power transfer, but a bar that is too stiff transmits trail feedback straight into your hands. Over a long ride, that shows up as hand fatigue and arm pump.
Alloy sits in a middle ground: stiffer than many budget carbon bars and heavier than premium ones, with moderate vibration damping. Grip choice and glove choice often change comfort more than the bar material does. Aerodynamic efficiency and drop handlebars matter for road riders chasing speed, but for trail riding, comfort and control decide how the ride feels. What most guides miss is that a well-chosen alloy bar plus good grips usually beats a stiff carbon bar with cheap grips.
Maintenance, Inspection, and Fatigue Life
Inspection is where alloy quietly wins, but only if you actually know what to look for. Every few rides, and always after a crash or a hard hit, run this checklist. It takes about two minutes.
The alloy handlebar inspection checklist:
- Clamping area. Look for ovalization, a shiny wear ring, or a dent where the stem clamps. Over-torquing crushes the bar here, and a crushed bar is a cracked bar waiting to happen. Run a fingernail across the surface; a dent will catch.
- Sweep and rise bends. Sight down the bar from one end. Any deviation from the original bend means the bar has yielded. A bend is not cosmetic, it means the material has already passed its yield point.
- Bar ends and grips. Remove the grips and inspect the tube ends for cracks radiating from the cut. A burr or sharp edge from a hacksaw cut is a stress riser.
- Lever and control clamps. Check for crush marks where brake and shifter clamps sit. These are common over-torque sites.
- Finish and corrosion. A scratched anodized finish or road salt exposure can start surface pitting. Pitting is a stress riser, and stress risers are where fatigue cracks begin. Wipe the bar down and keep the finish intact.
- Torque re-check. Re-check stem and control bolts after the first few rides. New assemblies settle.
Fatigue life and load cycles. Every bar accumulates load cycles, every bump, every sprint, every curb hop. Aluminum does not have an infinite fatigue limit the way steel does, so a bar that has seen years of hard use is not the same bar it was new. Mechanical properties vary by alloy and manufacturing method, so there is no universal replacement interval. The practical rule: replace any bar that has taken a hard impact, shows a bend, or has visible pitting at a stress riser. When in doubt, replace it. A bar is one of the cheapest safety-critical parts on the bike.
Corrosion is a minor worry for alloy compared to steel, but it is not zero. Sweat, road salt, and scratched anodizing all accelerate surface pitting. A wipe-down after wet or salty rides is cheap insurance.
Compatibility check before you buy. Confirm the clamping area diameter matches your stem (most modern bars are 31.8 mm, though 35 mm is increasingly common on mountain bikes) (sheldonbrown.com). Check whether the bar supports internal cable routing, alloy bars can be drilled for internal routing, but the holes are stress risers and many riders prefer external routing for easier maintenance. Verify the bar works with modern brake and shifter controls, and confirm the rise, sweep, and width match your reach and riding style before you cut anything.
Weight-to-Price and Sustainability: Two Angles Most Guides Skip
Two factors rarely get covered. First, weight-to-price ratio: alloy bars give you most of the performance for a fraction of the cost, and the money saved can go toward tires, brakes, or a better cockpit setup. Second, sustainability: aluminum is widely recycled and holds strong resale and recycling value, while carbon composite is far harder to recycle. For riders who care about the end of a product's life, alloy is the more responsible choice.
Compatibility is the third angle. Before buying, confirm the clamping area diameter matches your stem, check whether the bar supports internal cable routing, and verify it works with modern brake and shifter controls. Most alloy bars are designed to fit standard stems and controls, which keeps upgrades simple.
| What You Get | Alloy | Carbon |
|---|---|---|
| Best for budget builds | Yes | No |
| Easiest to inspect after a crash | Yes | No |
| Lightest option | No | Yes |
| Most recyclable | Yes | No |
The hard part of a cockpit upgrade is not choosing between materials; it is finding a bar that is durable, affordable, and easy to live with. Health and Fitness Company builds gear for exactly that rider: the Alloy Bicycle Handlebar offers alloy durability with rubber lock-on grips, and the Outdoor Sports Cycling Gloves add a secure, non-slip grip for cold rides. Get started with Health and Fitness Company and ride a cockpit you can trust season after season.
Frequently Asked Questions
What are the pros and cons of alloy handlebars compared to carbon handlebars?
Alloy handlebars cost far less, survive crashes without catastrophic failure, and resist impact damage. They weigh slightly more and transmit more trail vibration than carbon. Carbon bars damp vibration better and can be lighter, but they cost two to three times more and can crack on hard impacts. For most riders, alloy bicycle handlebars offer the better balance of price, durability, and predictable performance.
Are alloy handlebars safe for aggressive mountain biking?
Yes. Alloy handlebars are the standard on most trail and enduro bikes because they bend before they break, giving you a warning sign instead of a sudden failure. Inspect for stress fractures, deep scratches, or bends after any hard crash. Replace bars showing those signs. Carbon can fail suddenly, while alloy usually deforms first, which is a real safety advantage on rough terrain.
Do alloy handlebars provide enough vibration damping for long rides?
Alloy transmits more vibration than carbon, but you can close most of the gap with setup choices. Wider bars, thicker grips, and the right rise and sweep reduce hand fatigue and arm pump. Many riders on 40-mile weekly routes find alloy bars comfortable once grip and cockpit setup are dialed in. If buzz still bothers you, a carbon bar is the next step, but it costs much more.
What should I look for when buying alloy handlebars for my bike?
Match the clamping area diameter to your stem, typically 31.8 mm on modern bikes. Check the rise, sweep, and width against your riding style and shoulder width. Confirm internal cable routing if your frame uses it. Look for an anodized finish, which resists corrosion. Finally, check the weight and price together: a $20 to $40 alloy bar often delivers the same stiffness and durability as bars costing three times more.