Wrist Weights for Beginners: Benefits & Safe Use

Table of Contents
- What Wrist Weights Do for Beginners
- How to Use Wrist Weights for Walking
- How Heavy Should Wrist Weights Be
- Wrist Weights Workout Routine for Beginners
- Risks and Injuries to Avoid
- Proper Form and Technique Essentials
- When to Skip Wrist Weights
- Conclusion
Last Updated: August 28, 2026
What Wrist Weights Do for Beginners
Wrist weights offer a straightforward way to add resistance training to everyday activities like walking and cardio without requiring dedicated space or new movement mechanics. They attach directly to your arms, increasing caloric expenditure and building muscle tone during activities you're already doing.
For beginners, the appeal is clear: they're accessible, require minimal learning curve, and integrate seamlessly into existing routines. Adding 1-2 pounds to each wrist during a 30-minute walk transforms standard cardio into resistance training without requiring you to learn new movements.
However, wrist weights aren't a one-size-fits-all solution. They won't replace a structured strength program, but they can amplify results. They won't magically burn calories without effort, but they do increase metabolic demand during movement. At Health and Fitness Company, we provide top-quality equipment designed for performance, including adjustable weighted wrist and ankle bands to support your bodybuilding and training goals.

How to Use Wrist Weights for Walking
Walking with wrist weights requires minimal adjustment to your normal stride, but technique matters. Focus on maintaining natural arm swing and proper posture while the added weight increases demand on your shoulders, arms, and core stabilizer muscles.
Keep your arms relaxed and swinging naturally at your sides with elbows bent at roughly 90 degrees and hands loose, not clenched. Many beginners tense their shoulders or hold their arms too rigidly, which creates unnecessary joint stress.
Your walking pace doesn't need to change. You're simply adding resistance to a familiar movement pattern, allowing you to focus entirely on managing the added weight rather than learning new mechanics.
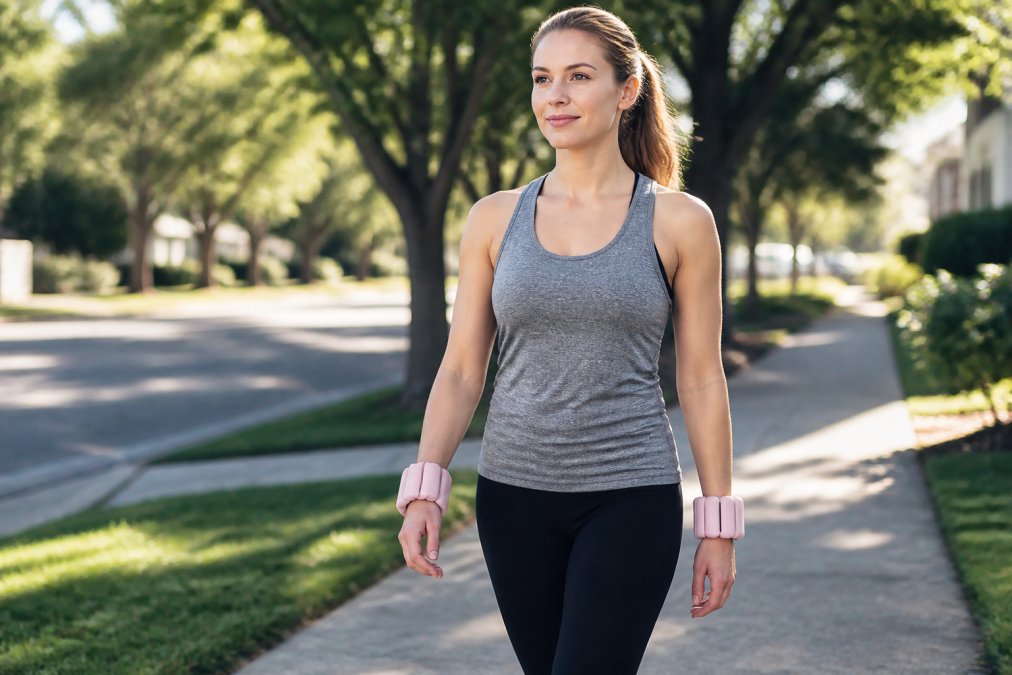
A 20-30 minute walk with wrist weights, done 3-4 times per week, produces better results than sporadic longer sessions (acsm.org). Start with your current walking routine and add wrist weights for the full duration. As that becomes comfortable over 2-3 weeks, increase either the weight or duration, but not both simultaneously.
Keep your wrists neutral, not bent backward or forward. A bent wrist changes load distribution on your joints and can lead to tendonitis or strain. Your wrist should stay straight throughout the arm swing with weight distributed evenly across the band.
How Heavy Should Wrist Weights Be
The right weight depends on your current fitness level, the activity, and your goals. Beginners should typically start with 1-2 pounds per wrist for walking or cardio, and 0.5-1.5 pounds per wrist for upper body exercises (acsm.org).
After 10-15 minutes of activity, you should feel mild fatigue in your arms and shoulders, but not pain or excessive strain. If you're not feeling anything by the end of a 20-minute session, the weight is too light. If your form breaks down after 5 minutes or your joints hurt, it's too heavy.
Many beginners start too heavy, thinking more weight equals faster progress. This backfires by creating compensatory movement patterns where your body strains your neck, shoulders, or wrists instead of building intended muscles.
The adjustable design of products like the Adjustable Weighted Fitness Wrist and Ankle Band from Health and Fitness Company solves this problem. You start at a lower weight, use it for 3-4 weeks until it feels easy, then add more weight without buying new equipment. This progressive approach builds sustainable strength gains without injury.
If you can complete your planned activity with good form and feel like you could do 2-3 more repetitions, your weight is appropriate. If you're struggling to finish or your form deteriorates, reduce the weight.
Wrist Weights Workout Routine for Beginners
A beginner routine should focus on familiar movements, then add weight to amplify the effect. Start with 2-3 sessions per week, allowing at least one rest day between sessions. Each session should last 20-30 minutes, mixing upper body toning with cardio or aerobic movements.
Upper Body Toning Exercises
Arm circles are the foundation movement. Stand with feet shoulder-width apart, extend your arms out to shoulder height, and make small circles forward for 30 seconds, then backward for 30 seconds. Rest for 30 seconds and repeat for 3 sets. This activates your deltoids and rotator cuff safely.
Bicep curls come next. Stand with feet hip-width apart, arms at your sides, and curl your hands toward your shoulders, keeping elbows stationary. Lower slowly back to start. Perform 12-15 repetitions for 3 sets. Control matters more than speed.
Lateral raises target the side of your shoulders. Stand with arms at your sides, then raise them out to shoulder height, keeping a slight bend in your elbows. Lower slowly. Perform 12-15 repetitions for 3 sets. This movement builds shoulder stability and upper body endurance.
Overhead shoulder presses are more advanced. Bring your hands to shoulder height with elbows bent, then press overhead until arms are nearly straight. Lower back to shoulder height. Start with 8-10 repetitions for 2 sets only after your shoulders feel stable during arm circles and bicep curls.
Cardio and Aerobic Endurance Work
Walking with wrist weights is the primary cardio activity for beginners. Marching in place with wrist weights is an accessible alternative. Stand in one spot and lift your knees as if marching, swinging your arms naturally. Perform this for 2-3 minute intervals, rest for 1 minute, then repeat for 3-4 rounds.
Shadow boxing with wrist weights is more dynamic. Stand in a comfortable stance and throw light punches forward, focusing on controlled movement. Perform 1-2 minute rounds with 1-minute rest periods.
A sample beginner routine: Monday, 20 minute walk with wrist weights plus arm circles and bicep curls; Wednesday, 15 minute marching intervals with lateral raises; Friday, 20 minute walk with shadow boxing rounds.
Risks and Injuries to Avoid
Wrist weights aren't dangerous when used correctly, but they introduce specific risks. The most common injuries come from starting too heavy, using poor form, or progressing too quickly.
Tendonitis is the primary concern (peer-reviewed research). Your tendons adapt more slowly than muscle. When you add weight too aggressively, your tendons may not be ready for the increased load, leading to inflammation and pain. If you feel a dull ache on the inside or outside of your wrist or along your forearm, reduce the weight immediately and rest for 3-5 days.
Repetitive strain injuries develop when you perform the same movement with poor form repeatedly. Your body compensates by altering movement patterns, putting stress on joints not designed for that load angle. A lighter load with perfect form is always better than heavier weight with compromised mechanics.
Shoulder impingement can occur if you perform overhead movements before your shoulder stabilizer muscles are ready. This causes sharp pain during or after overhead exercises. Avoid overhead presses until you've spent 2-3 weeks building shoulder stability with arm circles and lateral raises.
Wrist strain happens when you bend or rotate your wrist while wearing wrist weights. Keep your wrist neutral and straight during all movements. The best injury prevention strategy is gradual progression. Start light, move well, then gradually increase weight. If something hurts, stop immediately and assess your form.
Proper Form and Technique Essentials
Proper form means maintaining neutral joint alignment, controlled movement speed, and appropriate load distribution throughout every exercise.
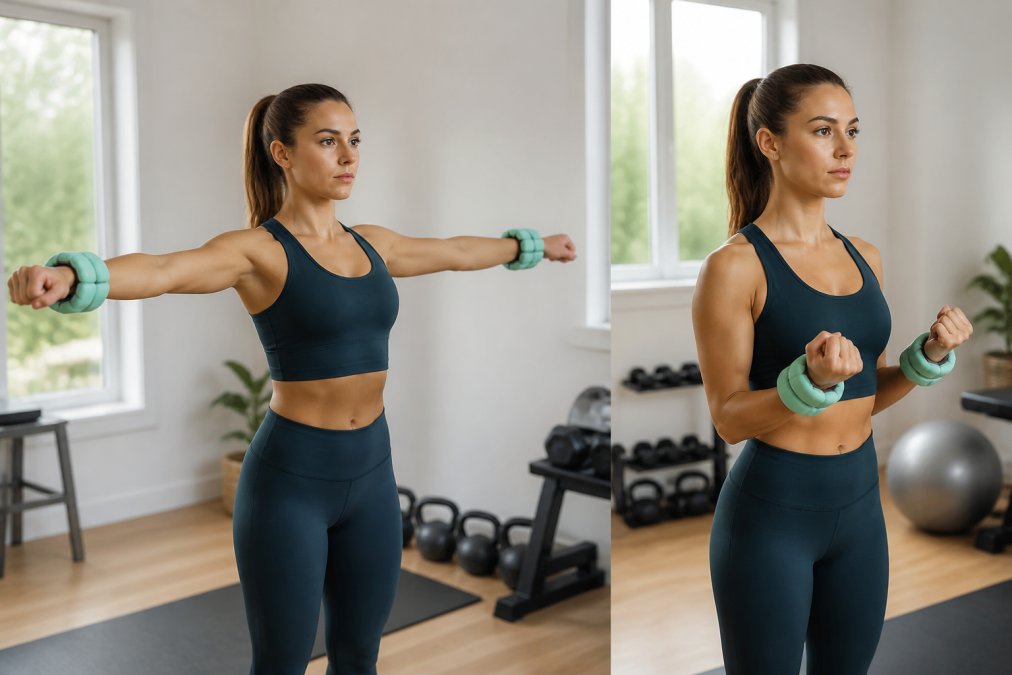
Neutral wrist position is the foundation. Your wrist should stay straight, not bent backward, forward, or twisted, during all movements. The weight should sit on the back of your hand, distributed evenly across the band.
Elbow positioning matters for upper body exercises. Keep your elbows close to your body and at a consistent angle. Don't let them flare out to the sides, as this shifts load away from your target muscles toward your shoulder joint.
Movement speed should be controlled and deliberate. Perform each repetition in about 2-3 seconds, with emphasis on the lowering phase. Avoid swinging or using momentum. If you need momentum, the weight is too heavy.
Breathing matters more than most beginners realize. Exhale during the exertion phase and inhale during the easier phase. Never hold your breath, as this increases intracranial pressure and can cause dizziness.
Posture during walking and standing exercises is critical. Keep your shoulders back and down, your spine neutral, and your core engaged. Stand tall and let your arms swing naturally.
Range of motion should be full but controlled. Move through the complete range your joints allow, but don't hyperextend or lock out your joints at the end of a movement.
When to Skip Wrist Weights
If you have a history of shoulder, elbow, or wrist injuries, consult a physical therapist before adding wrist weights. Even healed injuries may have reduced stability or range of motion.
Acute pain in your wrist, elbow, or shoulder is a clear signal to stop. Pain is different from muscle fatigue. If you experience pain, remove the weights and rest for 3-5 days.
If you're recovering from an illness or haven't exercised in more than a month, start with your normal routine for 2-3 weeks before adding wrist weights. Your cardiovascular system, muscles, and connective tissue need time to adapt before you add external load.
During pregnancy, wrist weights may not be appropriate without medical clearance. Your center of gravity changes and your joints become more mobile due to hormonal changes.
If you're dealing with repetitive strain in your wrists or forearms from work or other activities, adding wrist weights could compound the problem. Rest and physical therapy should come first.
Uncontrolled high blood pressure is another consideration. Resistance training increases blood pressure during exercise. Get medical clearance before starting any new resistance training program.
Conclusion
Wrist weights for beginners work best when they're part of a deliberate, progressive plan. Start with 1-2 pounds per wrist, focus entirely on maintaining neutral wrist position and controlled movement, and increase weight only after 3-4 weeks when your current load feels easy. The goal is to train consistently and correctly so you can keep training for months and years without injury.
If you're ready to add wrist weights to your routine, the Adjustable Weighted Fitness Wrist and Ankle Band from Health and Fitness Company gives you the flexibility to start light and progress gradually as your strength improves. With adjustable weight increments, you can build sustainable upper body strength and increased caloric expenditure without the bulk of traditional dumbbells. Get started with wrist weights and enhance your endurance and muscle tone.
Frequently Asked Questions
Q: Does wearing wrist weights actually help for beginners?
A: Yes. Wrist weights increase resistance training intensity during cardio and bodyweight exercises, boosting caloric expenditure and muscle engagement. For beginners, they add progressive overload without the learning curve of free weights. Start light (1-2 pounds per wrist) to build stabilizer muscles and joint strength safely. Consistent use with proper form can lead to noticeable improvements.
Q: How heavy should wrist weights be for a beginner?
A: Begin with 1-2 pounds per wrist if you're new to resistance training. This weight builds foundational strength without causing joint stress or gait alteration. After 2-3 weeks, increase by 0.5-1 pound if exercises feel easy. Adjustable wrist weights like our Adjustable Weighted Fitness Wrist and Ankle Band let you scale weight as you progress, making them ideal for beginners tracking strength gains.
Q: Can wrist weights really tone your arms and build muscle?
A: Wrist weights contribute to upper body toning by adding resistance to arm movements, stimulating muscle hypertrophy in the shoulders, biceps, and forearms. Combined with exercises like arm circles, lateral raises, and walking, they create progressive overload needed for muscle development. Results depend on consistency and proper form.
Q: What's the difference between wrist weights and dumbbells for beginners?
A: Wrist weights distribute weight around your wrist, keeping your hands free for balance and natural arm swing during cardio and walking. Dumbbells require grip strength and technique. For beginners, wrist weights are safer for dynamic movement, easier on joints, and better for building aerobic capacity while adding resistance. Dumbbells excel for isolated strength work but demand more form precision.
This article was written using GrandRanker