How to Safely Use Weighted Wrist Bands: A 2026 Guide

Table of Contents
- What You'll Need Before You Start
- How to Choose the Right Weighted Wrist Bands
- Step-by-Step: How to Put On and Position Weighted Wrist Bands
- Best Exercises for Wrist Weights
- How Long to Wear Weighted Wrist Bands
- How to Avoid Injury with Wearable Weights
- Progressive Overload and Recovery Protocol
- Common Mistakes to Avoid
- Frequently Asked Questions
Last Updated: September 14, 2026
What You'll Need Before You Start
Knowing how to safely use weighted wrist bands starts with preparation. They add load to your forearms and wrists during walking, calisthenics, or shadow boxing.
Before your first session, gather these essentials:
- Adjustable wrist bands with secure fasteners (velcro straps that stay put)
- A snug athletic top or long sleeves to reduce chafing
- Athletic tape or wrist wraps if you have sensitive skin
- A water bottle and a timer
- A mirror or phone camera for form checks
Start with the lightest setting your bands offer. Treating wrist weights like dumbbells, where heavier feels like progress, is a mistake: the load sits far from your center of mass, magnifying joint stress with every swing.
How to Choose the Right Weighted Wrist Bands
The right weighted wrist bands balance adjustability, fit, and material quality. Beginners do best with bands that add or remove weight in small increments, so you can progress without buying a new set every few weeks.
Material and Design Selection
Choose neoprene or moisture-wicking fabric over cheap nylon, which traps sweat and slips. Reinforced seams at the strap anchor points keep a band from failing mid-swing.
An ergonomic design that contours to your forearm distributes weight evenly instead of concentrating it at one point, the difference between a band you forget you're wearing and one that digs in.
For a reliable option, the Adjustable Weighted Fitness Wrist and Ankle Band at $91.03 uses adjustable fastening and works for both wrists and ankles, so you get versatility from one purchase.

Recommended Weight Limits for Beginners
Start at 0.5 to 1 pound per wrist. That sounds light, and it is, deliberately: walking or shadow boxing multiplies even small loads across hundreds of repetitions.
Work up gradually:
- Weeks 1-2: 0.5-1 lb per wrist
- Weeks 3-4: 1-2 lbs per wrist
- Weeks 5+: 2-3 lbs per wrist, only if form stays clean
If your shoulders burn before your target muscles do, the weight is too heavy. Drop back down and rebuild.
Step-by-Step: How to Put On and Position Weighted Wrist Bands
Proper positioning takes about 30 seconds per wrist and prevents most beginner problems:
- Slide the band up your forearm until it sits 1-2 inches below the wrist crease, not directly over the joint.
- Center the weight pocket on the top of your forearm, away from the bony wrist prominence.
- Fasten the strap snugly. You should be able to slide one finger underneath, no more.
- Check the fit with a test movement. Rotate your wrist through its full range of motion. The band shouldn't shift or pinch.
- Repeat on the other arm, matching the position and tightness.
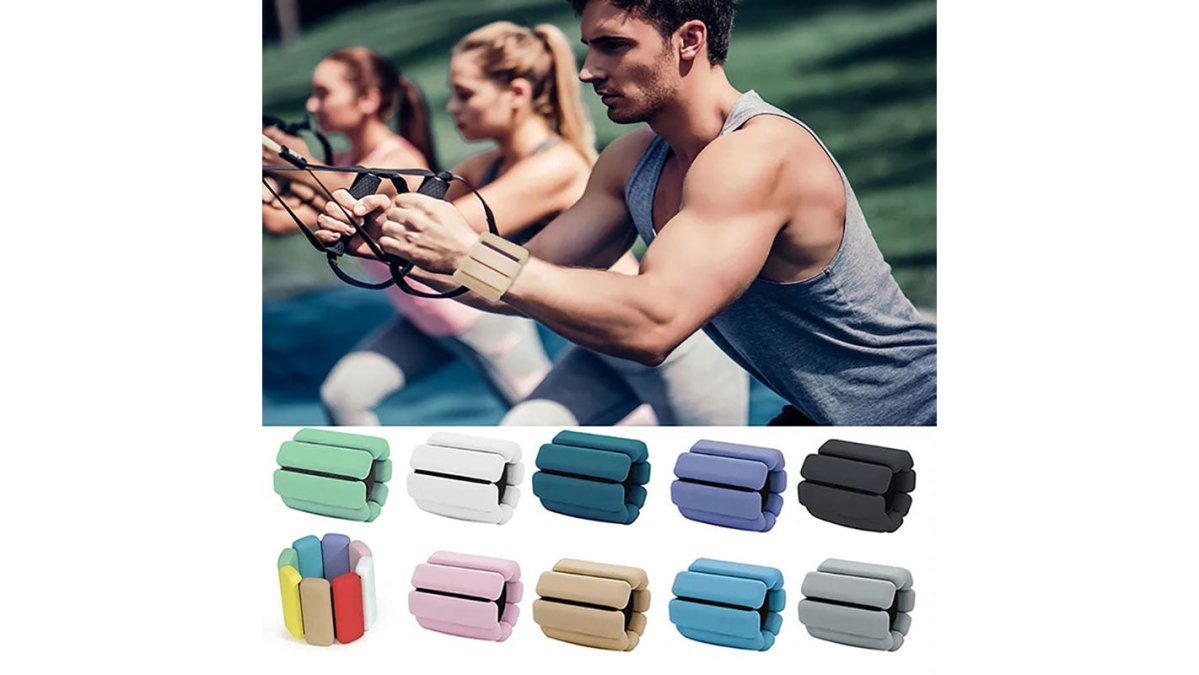
Proper Positioning and Fit
A snug fit is non-negotiable. Bands that slide force you to over-grip and tense your forearm muscles to hold them in place, defeating the exercise's purpose.
Position the band so the weight sits on the meaty part of your forearm, not the wrist joint. This protects the delicate structures around the wrist and lets larger forearm muscles absorb the load.
Best Exercises for Wrist Weights
The best exercises for wrist weights use natural arm motion rather than heavy resistance. Walking, calisthenics, and shadow boxing top the list because they combine cardiovascular work with light resistance training. The load should challenge muscles through controlled movement, not load joints at end range where connective tissue takes the strain.
Walking and Cardiovascular Training
Walking with wrist weights adds resistance to your natural arm swing without changing your gait. Keep your arms relaxed and let them swing naturally; tensing your shoulders to "work harder" causes neck and upper back fatigue.
Walking technique matters more than most people expect:
- Keep elbows bent at roughly 90 degrees, not locked straight, so the load stays close to your torso
- Swing from the shoulder, not the elbow, to avoid concentrating stress at the elbow joint
- Keep the band above the wrist crease so the weight rides on the forearm, not the wrist joint
- Shorten your stride slightly if the added load changes your posture
- Let your arms swing freely; do not pump them or hold them rigid
Aim for 20-30 minutes at a comfortable pace. The added load raises your heart rate slightly, so reduce weight if your form breaks down, if your shoulders burn before your legs or heart rate do, the load is too heavy.
Strength and Shadow Boxing Moves
Shadow boxing is where wrist weights shine. The controlled, repetitive motion builds arm and grip strength without heavy load: the weight adds resistance to each punch's acceleration and deceleration, so muscles work harder through the same range of motion. The risk is that momentum at the end of a fast punch pulls on the elbow and shoulder, form beats speed every time.
Try these moves:
- Bicep curls: 2 sets of 12-15 reps, slow and controlled, elbows pinned to your sides
- Shoulder rows: 2 sets of 12 reps, squeezing shoulder blades together, no shrugging
- Shadow boxing punches: 3 rounds of 1 minute, focusing on form over speed, stopping each punch short of full elbow lockout
- Lateral raises: 2 sets of 10 reps, stopping at shoulder height, no swinging
- Wrist curls and extensions: 2 sets of 15 reps each, using a light load and full but pain-free range
Keep your range of motion full but controlled. If you feel elbow pain, stop and reassess your weight, sharp pain during curls or punches usually means the load is pulling the joint into extension faster than your muscles can control.
Muscle Engagement vs. Joint Stress
Every wrist weight exercise sits on a spectrum between muscle engagement and joint stress. Stay on the muscle side.
- Muscle-dominant: slow tempo, controlled range, load close to the body, higher reps with lighter weight
- Joint-dominant: fast tempo, momentum-driven reps, load swinging away from the body, heavy weight for low reps
Wrist weights are poorly suited to joint-dominant work because the load sits at the end of a long lever (your arm). A 2-pound band at your wrist creates far more torque at the elbow and shoulder than a 2-pound dumbbell held close to your chest. Hence the standard advice: lighter weight, slower tempo, more reps. If a movement pulls your joint rather than challenging your muscle, reduce the weight or slow down.
How Long to Wear Weighted Wrist Bands
Twenty to thirty minutes per session is the sweet spot for most people. How long to wear weighted wrist bands depends on fitness level and activity, but longer isn't better.
Extended wear beyond 30-45 minutes increases repetitive strain on connective tissue without adding meaningful training benefit (Will Wearing Wrist Weights On A Walk Really Strengthen Your Arms? Experts Weigh In On The...). Muscles adapt during recovery, not during the session itself.
Start with 15 minutes and add 5 minutes per week until you reach 30. If you're doing multiple sessions per day, keep each one short and space them at least 4 hours apart.
How to Avoid Injury with Wearable Weights
Injury prevention with wearable weights comes down to load management and listening to your body. The most common issues are tendonitis, elbow pain, and shoulder strain from doing too much too soon: the load is fine for a few sessions, then the user adds weight or time faster than connective tissue can adapt.
Follow these safeguards:
- Never increase weight by more than 10% per week (ACSM Publishes Updated Resistance Training Guidelines)
- Stop immediately if you feel sharp pain, numbness, or tingling
- Alternate weighted sessions with unweighted ones
- Strengthen your rotator cuff and grip separately with dedicated exercises
- Warm up for five minutes before every weighted session, even short ones
- Replace bands as soon as fasteners stop holding securely
Contraindications for Specific Conditions
Wrist weights are not universally safe, and certain conditions make them a poor fit regardless of how light you start.
Carpal tunnel syndrome. The median nerve passes through a narrow tunnel at the wrist. Added load and compression from a band can aggravate symptoms, and repetitive wrist motion can flare the nerve further. Wrist weights are generally a poor choice; forearm or upper-arm loading is better, and only with medical clearance.
Arthritis (osteoarthritis or rheumatoid). Osteoarthritis means cartilage is already worn, and added load accelerates wear and can trigger flare-ups. Rheumatoid arthritis is an inflammatory autoimmune condition, and joint stress during a flare can worsen inflammation. Some people with well-controlled rheumatoid arthritis tolerate very light wrist weights under supervision; many do not. Get clearance first.
Previous rotator cuff injury or surgery. The rotator cuff stabilizes the shoulder through every arm swing. Wrist weights lengthen the lever arm and increase demand on the cuff. If you have had a rotator cuff tear, repair, or chronic impingement, wrist weights can re-aggravate the injury, especially during overhead or punching movements. Shoulder-safe loading usually means keeping the arm below shoulder height and using very light weight, if any.
Tendonitis or tendinopathy of the elbow or wrist. Tennis elbow and golfer's elbow are overuse conditions, and adding repetitive load to an already irritated tendon typically makes it worse. Rest and targeted rehab come first; weighted bands come later, if at all.
Nerve compression or circulation issues. Thoracic outlet syndrome, cubital tunnel syndrome, and peripheral neuropathy all involve compromised nerve function, and a snug band plus added load can worsen numbness and tingling. Skip wrist weights and consult a healthcare provider about alternatives.
Recent fracture or surgery in the arm, wrist, or hand. Bone and soft tissue need time to heal under load. Weighted bands should wait until you are fully cleared, and even then, start lighter than you think you need.
Pregnancy-related joint laxity. Hormonal changes during pregnancy loosen connective tissue, making joints more vulnerable to strain from added load. Many practitioners recommend avoiding wrist weights during pregnancy, or using them only with clearance and very light resistance.
Modifications If You Have a Condition
If you have one of these conditions but still want added resistance, move the load closer to your body and away from the affected joint:
- Shift from wrist bands to a weighted vest or belt, which loads the torso instead of the arms
- Use resistance bands anchored at the waist instead of wrist weights for arm work
- Reduce range of motion and tempo rather than reducing weight alone
- Shorten sessions and increase rest days
- Work with a physical therapist or qualified trainer who understands your condition
The right call depends on your specific diagnosis, so treat this as a starting point for a conversation with a healthcare provider, not a substitute for one.
Progressive Overload and Recovery Protocol
Progressive overload with wrist weights means small, planned increases over weeks, not jumping to heavier bands when a session feels easy. The standard approach is a 10% weekly increase in either weight or duration, never both at once.
A simple four-week protocol:
- Week 1: 1 lb per wrist, 15 minutes, 3 sessions
- Week 2: 1 lb per wrist, 20 minutes, 3 sessions
- Week 3: 1.5 lbs per wrist, 20 minutes, 3 sessions
- Week 4: 1.5 lbs per wrist, 25 minutes, 3 sessions
Recovery matters as much as the work. Stretch forearms, wrists, and shoulders after every session; wrist flexor and extensor stretches plus gentle shoulder circles keep connective tissue supple and reduce next-day soreness.
| Factor | Beginner | Intermediate | Advanced |
|---|---|---|---|
| Weight per wrist | 0.5-1 lb | 1-2 lbs | 2-3 lbs |
| Session length | 15 min | 20-25 min | 30 min |
| Sessions per week | 2-3 | 3 | 3-4 |
| Weekly increase | 5% | 10% | 10% |
Common Mistakes to Avoid
The mistakes that cause the most trouble are predictable and preventable. Over-gripping is the biggest: when bands feel loose, beginners clench their fists and tense their forearms to compensate. Fix the fit instead.
Other frequent errors:
- Wearing bands for hours instead of a defined session
- Skipping warm-ups because the weight feels light
- Progressing weight and duration at the same time
- Ignoring early warning signs like elbow pain or wrist stiffness
- Using worn-out bands with stretched straps that no longer hold position
Replace bands as soon as the fasteners stop holding securely. A band that slips mid-swing is a safety hazard, not just an annoyance.
Building a safe wrist weight routine takes patience and the right equipment. Health and Fitness Company designs adjustable weighted wrist and ankle bands with precision-engineered fasteners and durable materials that hold their fit session after session. With adjustable weight settings, a secure ergonomic design, and construction built for daily training, our bands support your strength goals without the slipping and snapping that plague cheap alternatives. Get started with Health and Fitness Company and train with gear that keeps up with you.
Frequently Asked Questions
Is it true that using wrist weights can tone your arms?
Wrist weights add resistance to arm movements, which can help build arm strength and muscular endurance over time. However, toning depends on overall training, diet, and consistency. Adding 1-2 pound weighted wrist bands to bicep curls, shoulder rows, or shadow boxing increases muscle activation. Combine with a balanced routine and proper nutrition for visible results.
How long should you wear weighted wristbands?
Start with 10-15 minutes per session for the first week, then gradually increase to 30-45 minutes as your muscles adapt. Avoid wearing them for more than 60 minutes continuously during cardio. For strength exercises, wear them only during the specific sets. Always remove them if you feel joint pain or numbness in your fingers.
Can wrist weights cause joint damage?
Wrist weights can stress joints if you use too much weight, wear them too long, or have pre-existing conditions like tendonitis or rotator cuff issues. Start with 1-2 pounds, maintain proper form, and avoid swinging your arms. If you have arthritis or elbow pain, consult a doctor before use. Stop immediately if you feel sharp pain.
What is the recommended weight for wrist bands for beginners?
Beginners should start with 1-2 pounds per wrist. This adds enough resistance to build arm strength without overloading your joints or disrupting your natural range of motion. Adjustable weighted wrist bands let you increase the load in small increments as your strength improves. Never jump more than 1 pound at a time.